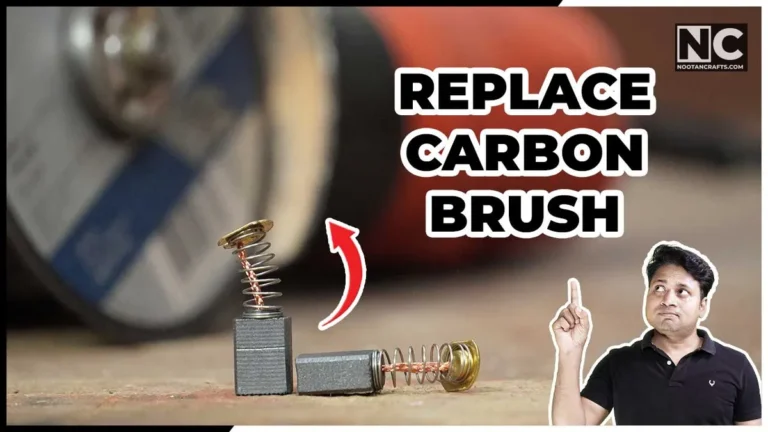
An angle grinder that has lost power, sparks more than it used to, or cuts out mid-job usually tells you its carbon brushes are worn. They’re two small blocks that press against the commutator — the ring of copper segments on the spinning armature — and carry current into it. They wear down every time you use the tool, and once they’re past their limit, the connection goes bad.
Replacing them takes about two minutes, and the parts cost very little. Before you order anything, spend one minute making sure the brushes are the real issue—and know how to measure for the right replacement, which is where most people go wrong.
Unplug it, or pull the battery, before opening anything
Always disconnect power before opening the housing or touching any internal components — both designs below involve hands near live electrical connections inside the tool.
- Let it cool. The brush caps sit right next to the motor and get hot enough to burn after a long cut.
- Work over a tray. The spring and cap are small, and they will roll under the bench the moment you drop them.
- Don’t run the tool with the housing open. Reassemble first, then test.
What’s Inside!
Is It Really the Brushes?
Worn brushes, a failing switch, and a burned-out armature all look similar from the outside: the tool gets weak or stops. Replacing brushes on a grinder whose motor has already gone is money and time spent for nothing. Three symptoms point specifically at the brushes.
| What you notice | Points to | How to tell |
|---|---|---|
| Weak under load, fine when spinning free | Brushes | The disc slows the moment it touches the work, then recovers when you lift off |
| Bright orange sparking at the rear vents | Brushes | A little blue spark at full speed is normal. Brighter, longer or orange is not |
| Cuts out, then runs again when you tilt it | Brushes | The spring no longer has the travel to hold contact |
| Dead with no spark and no hum | Switch or cord | Wiggle the cord at the tool end while it’s plugged in and switched on |
| Burning smell, smoke, or heavy sparking all around the motor | Armature | New brushes will not fix this. The motor has gone |
| Grinding or rumbling noise, disc wobble | Bearings | Spin the spindle by hand with the power off and feel for roughness |
Pull a brush out and look at it. This settles the question in thirty seconds and costs nothing. Most brushes have a wear line marked on the side. Past the line, replace. If the brush still has plenty of length left and the tool is still weak, the fault is somewhere else and new brushes won’t help.
I’ve had an angle grinder burn out on me, so I’d rather check first than order parts for a tool that’s already finished. One caution: worn brushes are noisy enough to hide bearing noise. If the tool still sounds rough after you install new brushes, the bearings were the problem all along.
How to Replace Carbon Brushes in an Angle Grinder — Video
- Matching pair of carbon brushes — sized to your tool, see below
- Flat screwdriver — for the external caps, which are slotted
- Small Phillips screwdriver — for the housing screws on Type 2
- Digital caliper — to measure the old brush before ordering
- Phone camera — photograph the wiring before you disconnect anything
Type 1 — External Cap Access


Some grinders have carbon brush caps visible on the outer body — no disassembly needed. Look for two black plastic screw caps on opposite sides of the motor housing, near the back.
- Unplug the tool. Every time, even for a two-minute job.
- Unscrew the cap on the side of the grinder body. It’s usually a wide slot that takes a flat screwdriver.
- Pull out the old brush. The spring pushes it out as soon as the cap is off, so catch it.
- Note which way around it sat. The contact face is curved to match the motor. Photograph it if you’re unsure.
- Insert the new brush in the same orientation. Direction matters — in the wrong way, the curve doesn’t match and the brush wears out fast.
- Screw the cap back on finger tight, then a nudge. Overtightening cracks the plastic.
- Repeat on the other side. Always replace both, even if only one looks worn.
Type 2 — Housing Access


Other grinders have no external caps, so the brushes sit inside and the housing has to come off. A few more steps, still a small job.
- Unplug the tool and let it cool.
- Open the housing. Keep the screws in a tray — they’re often different lengths, and they go back where they came from.
- Photograph the wiring before you disconnect anything. Two minutes of care here saves an hour of guessing later.
- Locate the brush holders. They sit opposite each other against the motor, each with a wire running to it.
- Unscrew the holder and disconnect the connector.
- Remove the old brush. It’s usually held by a push lock, so a small screwdriver releases it.
- Insert the new brush in the same orientation as the old one, curve matching the motor.
- Reconnect and reseat the holder, then do the other side and reassemble.

How to know when brushes need replacing: most brushes have a wear line marked on them. If the brush has worn down past that line, replace it. Don’t wait until the grinder stops completely—a brush that runs down to the spring can score the motor, turning a cheap job into a dead tool.
Buying the Right Brush
This is where things go wrong. Carbon brushes are sold by three measurements, written in this order: thickness × width × length, in millimeters. A brush described as 6 × 9 × 15 is 6 mm thick, 9 mm wide, and 15 mm long.
- ThicknessThe narrow face, the one that slides between the walls of the holder
- WidthThe other face of the cross-section, measured square to the thickness
- LengthFrom the contact face to the top. This is the dimension that shrinks as it wears
Measure the old brush with a caliper rather than a ruler, and measure thickness and width on the unworn part. Length is the one dimension you can’t read off a worn brush, so take it from the part number or the manual if you have either. If you don’t own a caliper, a cheap digital one pays for itself the first time it stops you ordering the wrong part — the same tool covered in the caliper guide.
Half a millimeter is the whole margin. Industry clearance for a standard graphite brush runs roughly 0.04 mm to 0.33 mm per side. Half a millimeter oversize and the brush jams in the holder instead of sliding down as it wears. Half a millimeter undersize and it rattles and arcs. “Close enough” is not close enough here.
Check the connector too. Some brushes have a bare wire tail, some a spade terminal, some a spring already fitted. The dimensions can be right, and the part still be wrong if the connector doesn’t match. Where the maker sells a brush set for your model number, that’s the easy answer.
Recommended Carbon Brushes


Last update on 2026-10-20 / Affiliate links / Images from Amazon Product Advertising API
After You Fit Them
New brushes have a flat contact face, and the motor is round. Until they match, only the edges touch, which means more sparking and less power than the tool should have.
Run the grinder unloaded for about thirty seconds before you use it. That wears the face to shape. Expect a little extra sparking during those first seconds — it should settle. If it’s still sparking heavily after a minute of free running, switch off and check the brushes went in the right way round.
Carbon Brush Questions People Actually Ask
Do I have to replace both brushes at once?
Yes. They wear at nearly the same rate, so if one is finished the other is close behind. Mixing a new brush with a worn one puts uneven load across the motor, and you’ll be back inside the tool again shortly.
How long do carbon brushes last?
There’s no fixed figure. It depends on how hard you run the tool, how long each session is, and how dusty the work is — grinding masonry wears brushes far faster than cutting steel. Check them whenever the tool feels weaker, and look at them once a year regardless.
Can I put the brush in either way around?
No. The contact face is curved to match the motor. Fitted backwards, only an edge touches, so it sparks, runs hot and wears out quickly. Note the orientation before you pull the old one out.
My grinder still has no power after new brushes. What now?
Then the brushes weren’t the fault. Check the switch and the cord first, since those are cheap. Heavy sparking all around the motor, or a burning smell, points at the armature — at that point a repair usually costs more than the tool is worth.
Are cordless grinders the same?
Only the older ones. Brushless motors have no carbon brushes at all, which is one of the reasons they’re sold as lasting longer. If your tool says brushless on the body, this job doesn’t apply to it.
Is a bit of sparking normal?
A small blue spark at the vents when the tool is running at full speed is normal. Bright, long or orange sparking is not, and it’s one of the clearest signs the brushes are past their limit.
Brush replacement is one part of keeping a grinder running. For discs, safety, and cutting and grinding technique, the full beginner’s guide covers the rest, and there are separate walkthroughs for fitting a disc and controlling the speed.