If you want to know how to make a cross from wood, this blog post will give you the most comprehensive answer because I have described the ten most popular wood joinery methods that you can use to make a wooden cross.
Also, I designed 3D models for each joinery method to give you the clearest pictures, which are freely available to download. I will explain them practically with a step-by-step guide. Here are all ten, and how to pick between them.
What’s Inside!
- 1 – How to Make a Wooden Cross – Guide
- 2 – Which Joint Should You Use?
- 3 – 1. Overlap Lap Joint
- 4 – 2. Notched Overlap Lap Joint
- 5 – 3. Cross-half Overlap Joint
- 6 – 4. Edge Half-lapJoint
- 7 – 5. Angled Cross Half-lap Joint
- 8 – 6. Halved Molded Joint
- 9 – 7. Cross Dovetailed Half Lap Joint
- 10 – 8. Cross Half Lap Joint with One Side Dovetailed
- 11 – 9. Carpenter Tie Joint
- 12 – 10. Cross-Halving Joint with Housed Corners
- 13 – Picking One and Starting
How to Make a Wooden Cross – Guide
Whether you want to make a small wooden cross like a necklace or a large one like 6 feet, you can do that easily with the help of these methods. Because these wood joinery methods are the fundamentals of woodworking. I have shared ten wood joinery methods that allow you to make a cross from wood. You can choose whichever you find easy and convenient.
Let’s start with the most basic one!
You can also watch my YouTube video here for more detailed guides and instructions.
Which Joint Should You Use?
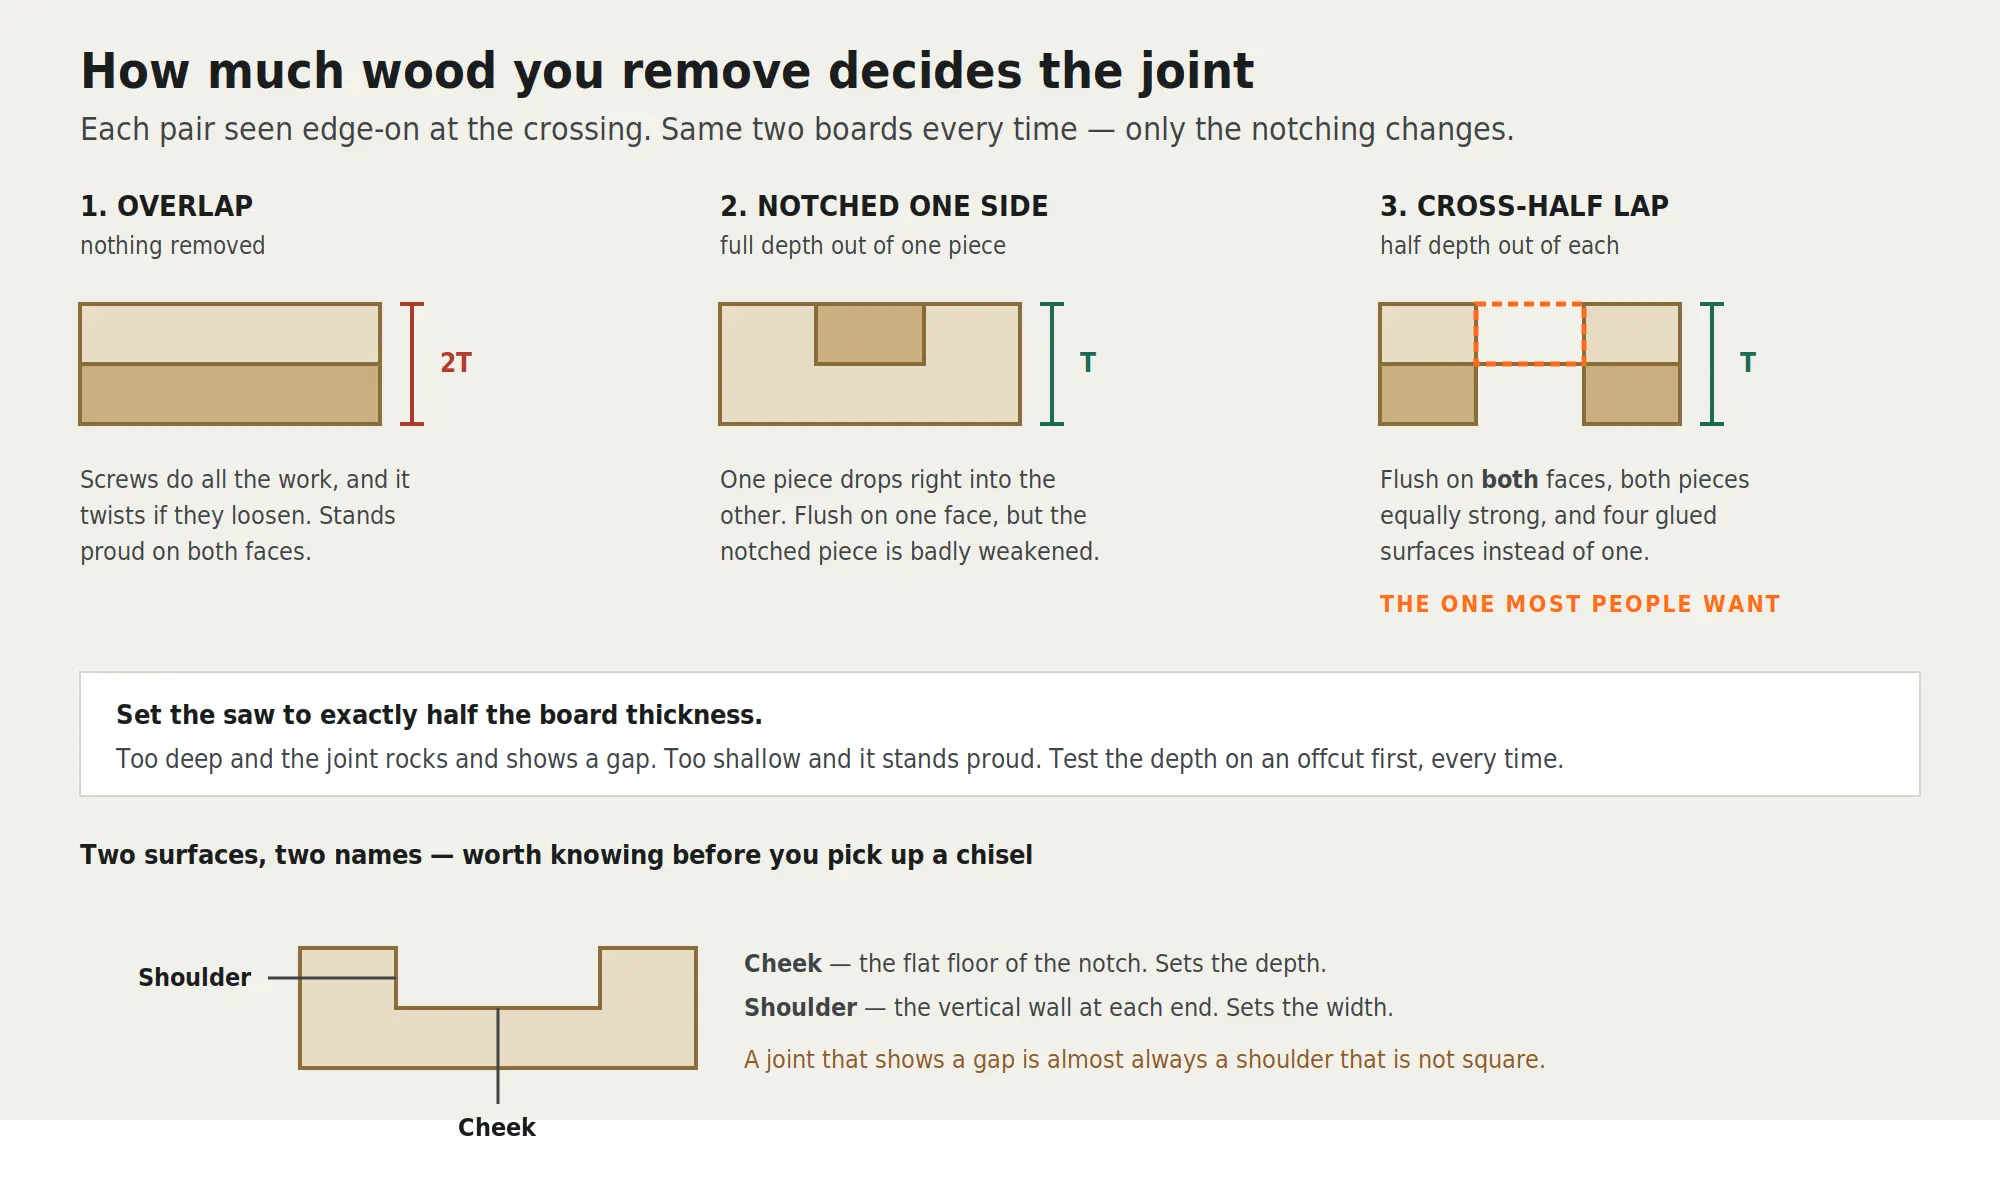
Ten methods is a lot to choose from, so here is the short version. Almost everyone building a cross wants number 3 — the cross-half lap. The rest exist because a particular job needs something the half lap does not give.
| Joint | Difficulty | Strength | Pick it when |
|---|---|---|---|
| 1. Overlap | Easiest | Weakest — screws carry everything | A quick cross, a prop, a child’s project. Nothing that has to last outdoors |
| 2. Notched one side | Easy | Moderate, but weakens the notched piece | One face has to sit flat against a wall |
| 3. Cross-half lap | Moderate | Strong and even | Almost always. Start here |
| 4. Edge half-lap | Moderate | Strong | Boxes, drawer dividers, organizers — crossing on the edge rather than the face |
| 5. Angled cross half-lap | Harder | Strong | The arms meet at anything other than 90 degrees |
| 6. Halved molded | Harder | Strong | The joint will be seen and you want it to look considered |
| 7. Cross dovetailed half lap | Hardest | Strongest in tension | Something will try to pull the arms apart lengthwise |
| 8. Half lap, one side dovetailed | Hard | Strong one way | The pull is only from one direction |
| 9. Carpenter tie | Hard | Strong, and decorative | The joint is part of the look |
| 10. Cross-halving, housed corners | Hardest | Strong, very clean | You want no gaps visible at any corner |
Scale changes the answer. A necklace-sized cross in thin stock cannot take a half lap without losing most of its strength — glue the faces and keep the pieces whole. A six-foot cross that will stand outdoors wants a half lap with waterproof glue and a screw through it, because the joint has to survive wind and wet as well as weight.
- Two boards of equal thickness — mine were 1.5 in
- Circular saw with an adjustable depth stop, or a hand saw
- Sharp chisel — a blunt one tears the cheek instead of paring it
- Combination square and a marking knife or sharp pencil
- Clamps, and a mallet rather than a hammer
- Wood glue, waterproof if the cross is going outdoors
- Offcut of the same stock for testing the saw depth
A circular saw making repeated shallow passes is the least stable way to use one
Every joint below except the first means removing a notch, and the usual method is a series of close parallel cuts. That puts the saw on a narrow workpiece, cutting partway through, many times over — which is exactly the situation where a blade binds and the saw comes back at you.
- Clamp the workpiece. Both hands on the saw. Holding a board with one hand while cutting it with the other is how people lose fingers.
- Support the offcut side. A piece that drops as it separates pinches the blade.
- Let the blade stop before you lift the saw. The guard needs time to close.
- Chisel away from your hand, always. Pare the waste in thin layers rather than driving for the line in one go — and keep the hand holding the work behind the edge, never in front of it.
- A blunt chisel is more dangerous than a sharp one. It needs force, and force is what makes it slip.
- Eye protection and hearing protection for the saw work.
1. Overlap Lap Joint
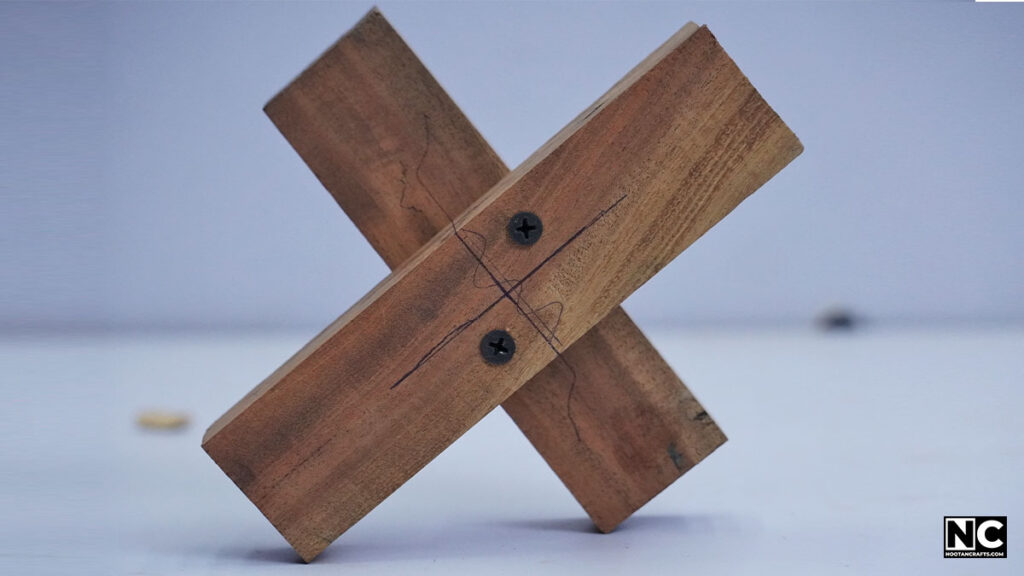
It is the most straightforward wood joinery method you can use to make a cross. Grab two wooden planks according to your project requirements. I am using a 1.5-inch thick wood.
- Place one piece of wood on top of the other.
- Choose the position wherever you want; if you want a perfect cross, make sure both pieces are equal in length.
- Now, mark the middle point in each piece and align it while joining.
- In our case, we are making a cross, so we must also maintain a right angle.
- To secure the joints, you can use nails or screws. That’s it, you did it.
2. Notched Overlap Lap Joint
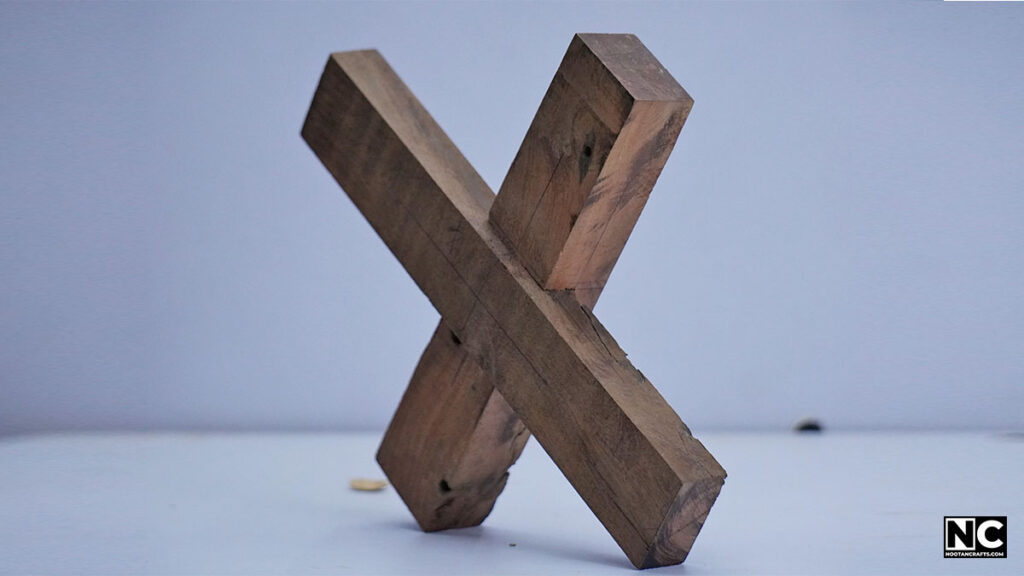
There is only one difference in this joint: we have to make a notch in either piece so the other one will snugly fit into it.
- To do that, place one piece on top of the other where you want to join them. Because we are making a cross, we will join it in the middle.
- Mark the middle point in each piece. I placed one piece on the other while aligning the center point and maintaining the right angle.
- I marked the notch area on either piece. We need to remove that part now.
- First, we can make two cuts close to our notch limit. I used a circular saw to make those cuts. Yes, we can also use a hand saw, which I will use in the 6th method.
- Now, we can remove the wood from our notch area with a chisel. Remember that the joint must require some force to fit; don’t make it loose.
- After finishing the notch, push the other piece in while maintaining the center lines.
- If it fits properly, you can finally apply wood glue and push it with a hammer or clamp. You have mastered the Notched Overlap Joint.
3. Cross-half Overlap Joint
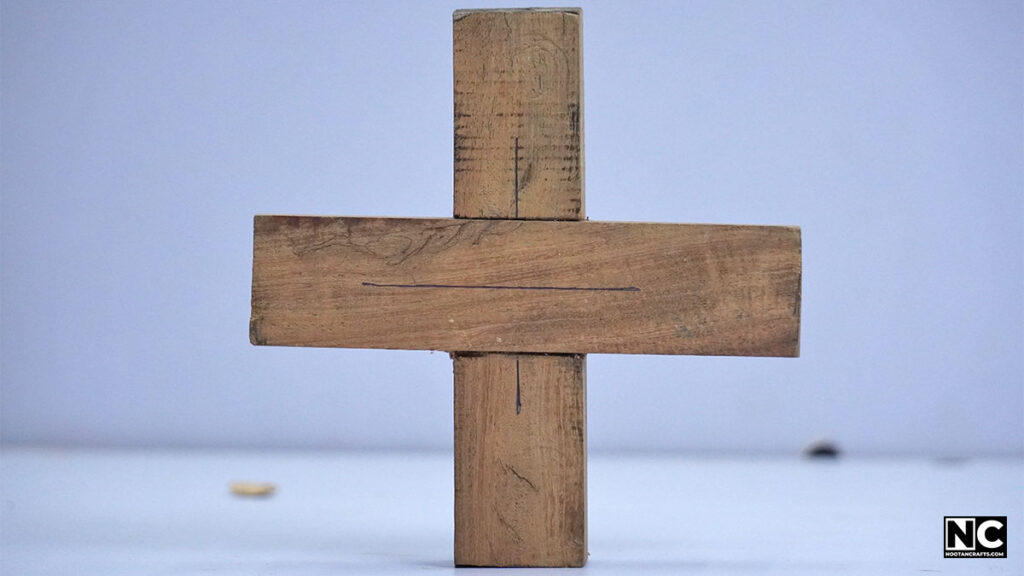
The main difference between the full and half overlap joint is that you have to cut the notch in both pieces. This way, they will fit together completely.
- To do that, mark the middle point on both pieces.
- Now, place one piece on the other, keeping the right angle and center in mind. Mark the notch area on both pieces.
- Set the depth of the circular saw blade to half of the wood piece. Make multiple passes through the notch area and remove the unwanted material. Try not to cut beyond the limit, as this will loosen the joint.
- Now remove the burrs with the help of a chisel and smooth the shoulder and the cheek.
- Make sure your chisels are sharp. Repeat the process for the second plank and check whether they fit.
- After that, align the notch area of both pieces and push with the mallet.
- If they fit correctly, remove them, and finally, apply wood glue and secure them permanently.
4. Edge Half-lapJoint
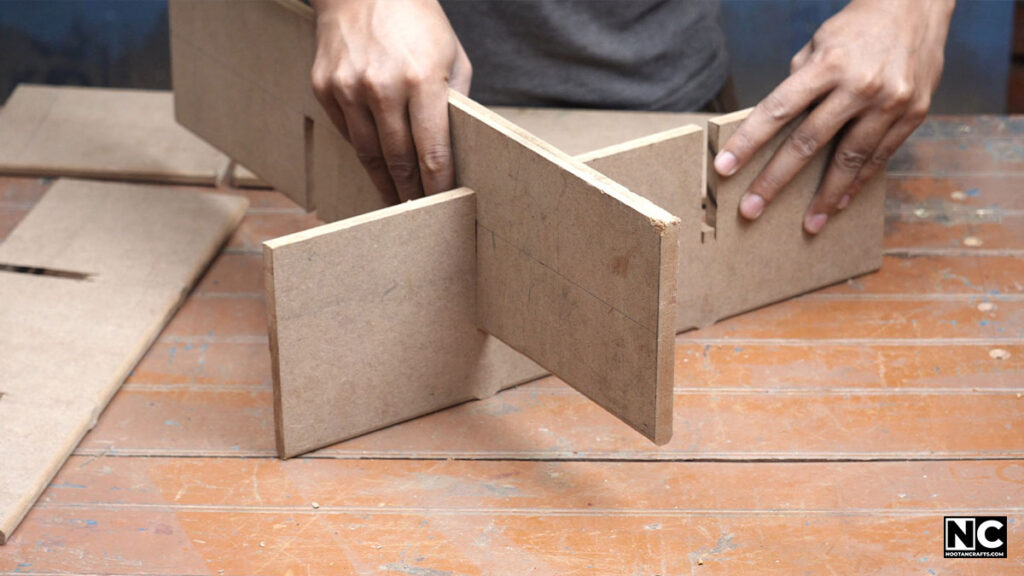
It’s the same as the cross-over half joint; the only difference is that you have to cut the edges of the pieces. For example, a couple of months ago, I made these desk organizers for my cupboard and computer desk drawers. This cross-joinery method is common for making boxes, drawers, and wall organizer shelves.
5. Angled Cross Half-lap Joint
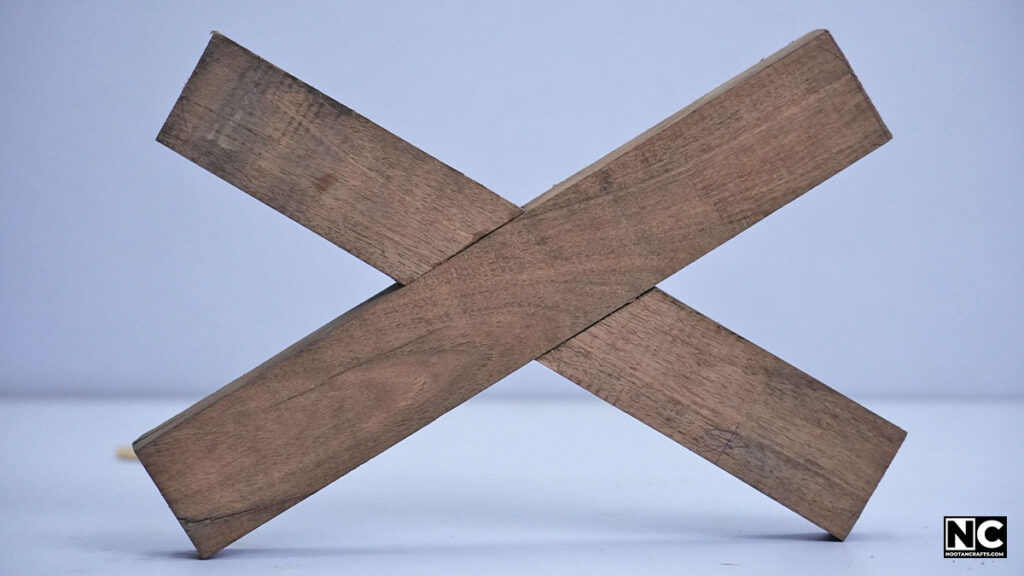
This joint comes in handy if you want to connect two wood pieces at an angle.
- Place one piece on the other at your desired angle and mark the lines for cutting notches.
- Make multiple cuts with a circular saw to remove the extra material.
- Use the chisel to smooth the notch’s shoulder and check.
- Repeat with another piece and check for fit. Finally, glue and join them.
Bravo, you made the angled cross half-lap joint.
6. Halved Molded Joint
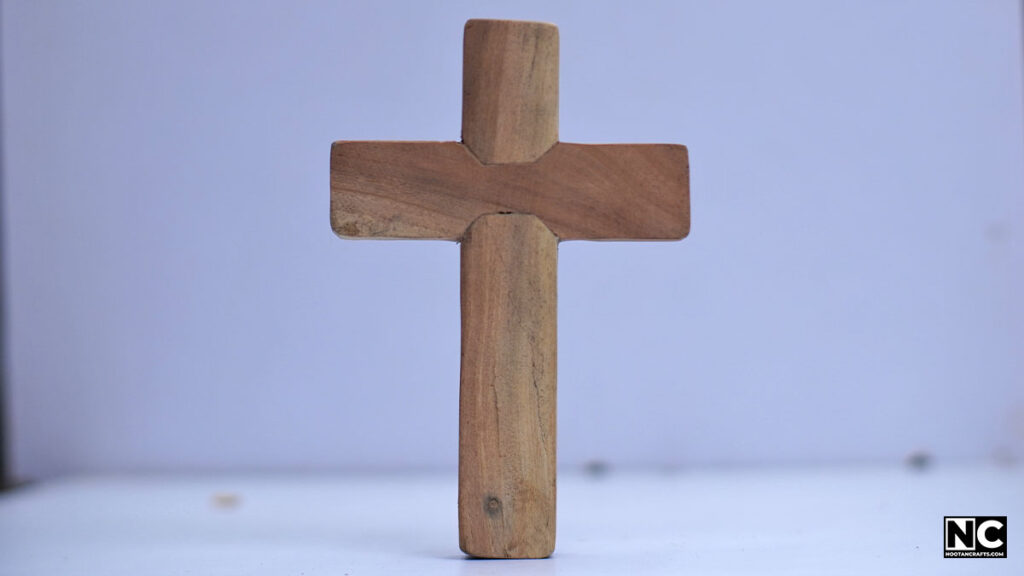
We can talk forever; there are many joint types, and it’s almost impossible to explain all of them. However, I am telling you the most popular ones that are easy, strong, and practical.
This joint is my favorite because it’s not just sturdy but also looks appealing, which adds a bit of sophistication to the joint.
Here is the diagram of how you can make it. You can download my plans for free from the description. All other steps are the same. Additionally, I have smoothened the wood with sanding, which looks a bit better. I know my joint isn’t exceptional, but I tried my best to explain.
Here are some more joinery methods for joining two pieces of wood and making a cross.
7. Cross Dovetailed Half Lap Joint
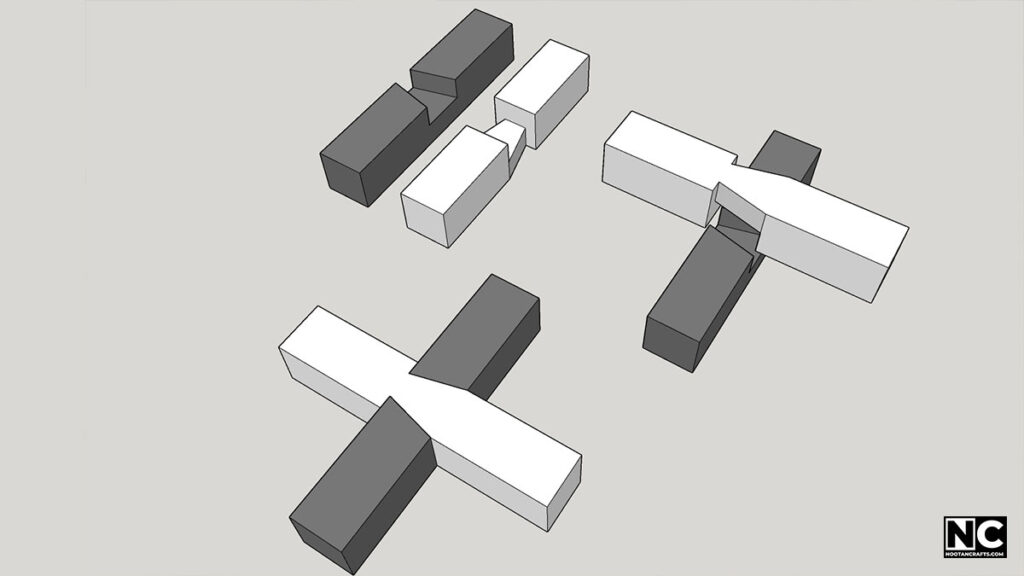
A cross-half lap where the notch is cut wider at the bottom than at the top, so its walls slope like a dovetail. The mating piece is shaped to match and slides in from one side.
Those sloping walls are the whole point. A plain half lap relies on glue to stop the arms pulling apart lengthwise. A dovetailed one cannot come apart in that direction at all, because the wood is in the way. Saw the shoulders first, then pare the slope with a chisel, and work slowly — it can only go together from one side, so there is no second attempt at the fit.
8. Cross Half Lap Joint with One Side Dovetailed
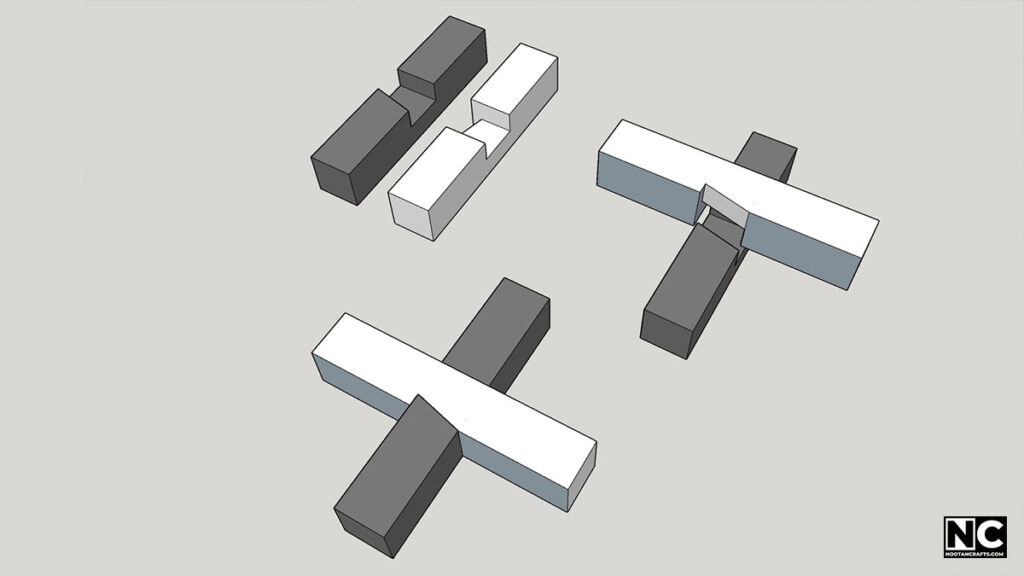
The same idea with only one wall sloped; the other stays square. That is much easier to cut and fit, and it still locks against a pull from one direction — just not the other. A fair compromise when you know which way the load comes, and the sensible one to attempt before the full dovetailed version.
9. Carpenter Tie Joint
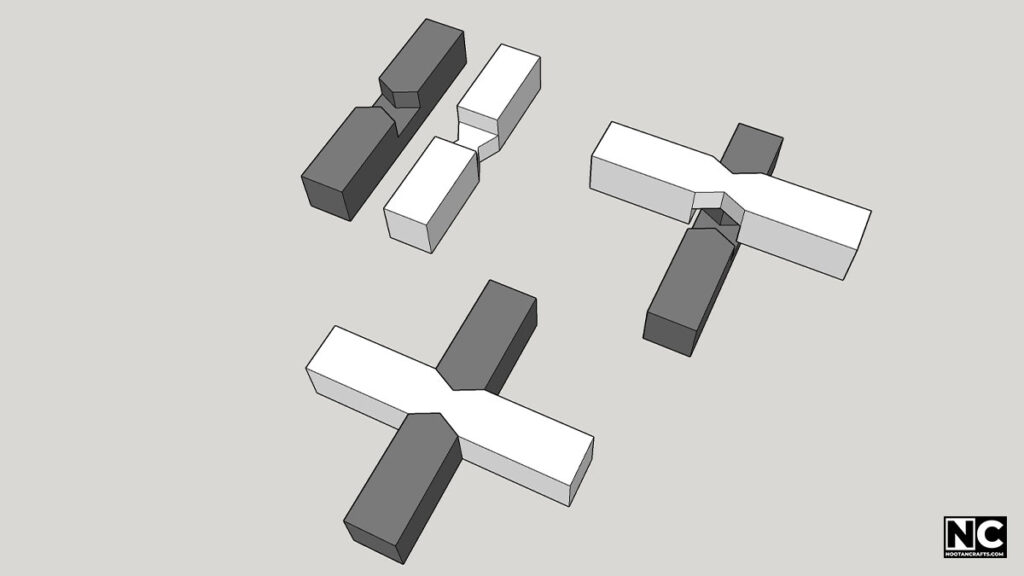
A halving joint where the lapped section is cut to a bowtie shape — narrow in the middle, flaring at both ends. Because it widens in both directions it resists being pulled apart either way, which is the dovetail idea taken a step further. It is also the most visible of the ten, so it gets used where the joinery is meant to be seen.
Worth admitting: when I filmed this one I set out to cut a carpenter tie and ended up with a halved molded joint. The photo shows what I actually made, not what I meant to make.
10. Cross-Halving Joint with Housed Corners
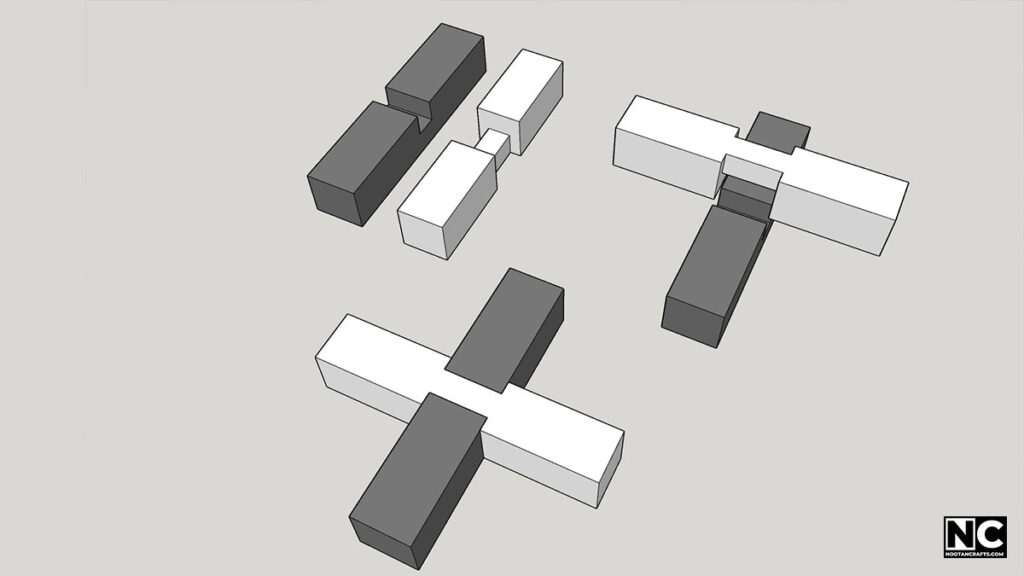
A standard cross-half lap, but each corner of the notch is cut with a shallow recess — housed — so the mating piece seats into a pocket rather than just sitting in a channel. It takes the longest of the ten and buys one specific thing: no gap shows at any corner, even if a shoulder is fractionally off. The joint to pick when the cross gets looked at closely and finished clear rather than painted.
Picking One and Starting
There are more ways to join two pieces of wood than anyone could usefully list, and these ten cover the ones worth learning. If you are starting out, cut a cross-half lap on two offcuts before you touch the real stock. The whole skill is getting the saw depth right and the shoulders square, and that takes one practice joint, not ten. The build video shows the cuts at full speed if you would rather watch than read.