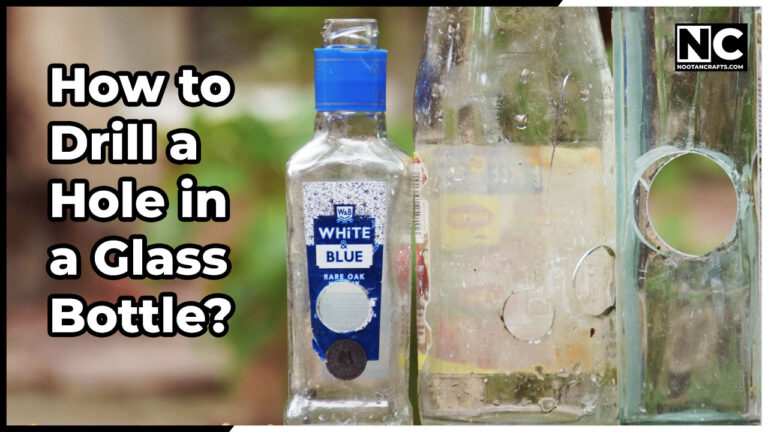
A diamond bit, water, and a speed slow enough to feel wrong. That is the whole method. Glass doesn’t cut like wood or metal—a diamond bit grinds through, and what usually goes wrong comes down to heat or a point load on an unsupported spot.
Before anything else, one check decides whether the job is possible at all.
You cannot drill tempered glass. It is not difficult; it is impossible. Tempered glass is held in permanent tension, so breaking the surface anywhere releases the whole pane at once, and it disintegrates into gravel. Ordinary bottles are annealed glass and drill fine. Oven doors, shower screens, car side windows and toughened tabletops are tempered — look for a small etched mark in a corner. If a piece is tempered, you have to make the hole before tempering, at the factory. No technique gets around this.
Required Tools


Last update on 2026-09-14 / Affiliate links / Images from Amazon Product Advertising API
What’s Inside!
What You Need
- Diamond bit — spear point for small holes, core bit for anything above about 12 mm (1/2 in)
- A drill with variable speed and no hammer setting engaged
- Water — a tray, a sponge, or a plumber’s putty dam
- Masking tape for the start, and a marker
- Safety glasses and a glove on the hand holding the bottle
- A towel or sand to cradle the bottle so it cannot roll
Nothing here is optional, and the water is the one people skip. A diamond bit run dry overheats in seconds, and hot glass under a spinning bit cracks from the inside out.
The Method
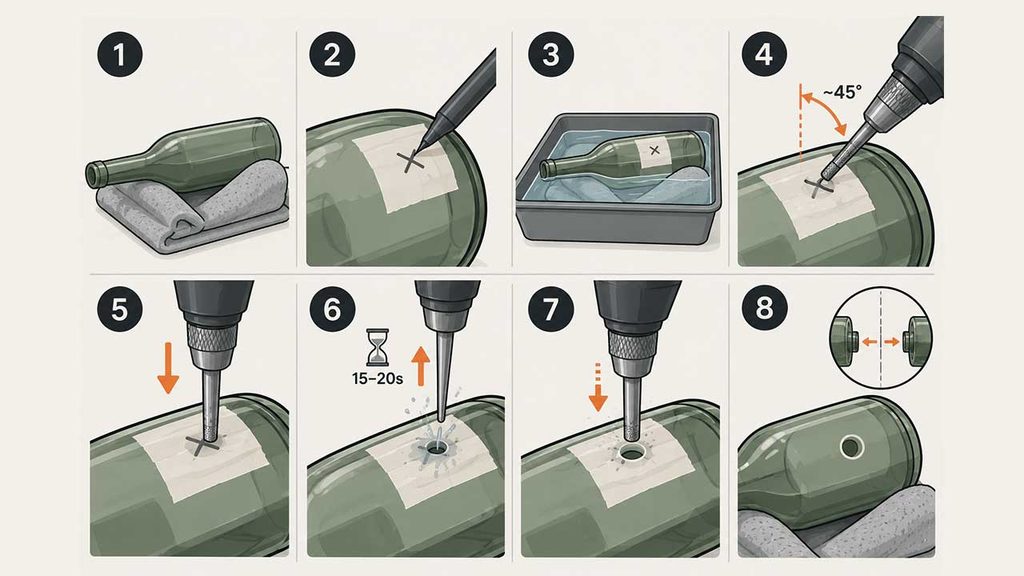
- Cradle the bottle so it cannot moveA towel folded into a V, a box of sand, or clamps with soft jaws. A bottle that rolls a few degrees mid-cut is a bottle that cracks. Never hold it in your hand alone.
- Tape the spot and mark itA square of masking tape stops the bit skating on the curved surface before it has bitten, and gives the marker something to hold.
- Set the water up firstSit the bottle in a shallow tray with 10-15 mm of water over the drilling area if it lies flat, or build a putty ring around the mark and fill it. On a vertical surface, a wet sponge held against the spot, re-wetted every 20 seconds, does the job.
- Start at an angle, then stand the bit upBegin at roughly 45 degrees so the bit’s edge cuts a small crescent, then bring the drill upright once that crescent has stopped it wandering. Starting square on a curved bottle is why bits skate.
- Slow speed, almost no pressureAround 400-600 rpm. The bit should sound like it is grinding, not squealing. Pressure does not speed this up; it cracks the glass. Let the diamonds abrade their way through.
- Lift every 15-20 secondsClear the slurry, let water back into the cut, check the bit is not steaming. This is the rhythm of the whole job.
- Ease off completely at breakthroughThe last fraction is where bottles chip. Reduce pressure to almost nothing as the bit begins to break through the far side.
- Drill from both sides if you can reachOn flat glass, go halfway, flip, and meet in the middle. It gives a clean edge on both faces instead of a blown-out one. On a bottle you usually cannot, so ease off harder at the end.
Water and Electricity, Together
You are deliberately introducing water to a running power tool
Every other job on this site tells you to keep the tool dry. This one requires the opposite, so the precautions are different rather than optional.
- Use a cordless drill if you have one. Battery voltage is not a shock hazard in the way line voltage is, and it removes the problem rather than managing it.
- If it is corded, put a GFCI in the supply. Not just care — a GFCI outlet or a plug-in GFCI adapter. Water on a floor and a corded tool is the exact case they exist for.
- Keep the water shallow and below the chuck. Enough to flood the cut, not enough to reach the tool.
- Safety glasses. Glass slurry is abrasive and it flicks.
- A glove on the steadying hand. If the bottle does crack, it cracks under your fingers.
- Never use hammer mode. If you are unsure which mode your drill is in, the drill types guide covers the selector. Check it before you start, not after the first attempt.
The Methods That Do Not Drill Holes
Two techniques come up constantly in searches for this, and both are worth knowing mainly so you don’t waste an afternoon on them.
| Technique | What it actually does | Use it for |
|---|---|---|
| Bottle cutter | Scores a continuous line around the bottle, then thermal shock separates it there | Cutting a bottle in half. It cannot make a hole in the middle of a face |
| Soldering iron and string, or a hot/cold cycle | Propagates a crack along an existing score line | The same job as above, more slowly. Still not a hole |
| Carbide masonry bit | Sometimes works on thin glass, often chips it badly | Nothing, if a diamond bit is available. The saving is not worth the bottle |
Making a hole and cutting a bottle are different jobs with different tools, and conflating them is why so many guides on this topic seem to change the subject halfway through. If you want the neck off, use a bottle cutter. If you want a hole for a cable, a tap or a fairy-light string, you need the diamond bit.
Why Bottles Crack
- Heat. The most common cause by a distance. Dry drilling, or drilling too fast, puts a hot spot into a material that cannot expand locally without breaking.
- Pressure. Glass has almost no give. Leaning on the drill concentrates force on a few square millimeters of an unsupported curved surface.
- An unsupported spot. A bottle resting on a hard bench touches it in only one place. Drill anywhere else and the glass flexes.
- Breakthrough. The far side has nothing behind it, so the last sliver breaks rather than grinds. Ease off.
- Drilling near the base or the shoulder. Both are thicker and more stressed than the straight side wall. Stay on the flat of the body where you can.
Common Questions
What drill bit do I need for a glass bottle?
A diamond bit. Spear-point for holes up to about 12 mm (1/2 in), a diamond core bit above that. Carbide masonry bits occasionally work on thin glass and chip it more often than not. Nothing else is worth trying.
What speed should I drill glass at?
Slow – roughly 400 to 600 rpm, and slower for larger bits. It will feel unproductive. Speed generates the heat that cracks the bottle, and diamond bits cut by abrasion, which does not get faster with rpm.
Do I really need water?
Yes. It is the single most important part of the method. It carries heat away and flushes the abrasive slurry out of the cut, and without it a diamond bit will overheat within seconds and glaze over – which ruins the bit as well as the bottle.
Can I drill a wine bottle?
Yes – wine, beer and spirits bottles are annealed glass and behave predictably. Drill on the straight side wall rather than the base or the shoulder, both of which are thicker and carry more internal stress.
How do I know if glass is tempered?
Look for a small etched stamp in one corner, usually naming the manufacturer and a standard. Bottles are never tempered. Shower screens, oven doors and toughened tabletops almost always are, and they cannot be drilled at any speed with any bit.
My bit stopped cutting – is it worn out?
More likely glazed. Diamond bits clog with glass slurry and stop biting; running them dry accelerates it. More water and a light dressing on a sharpening stone usually brings one back. If it stopped cutting suddenly while dry, the diamonds have probably come off the tip and it is finished.
If you only remember two things: check that it is not tempered, and keep the cut flooded. The same wet, slow, diamond-bit discipline applies to porcelain tile. Everything else on this page is a refinement of those.