A seashell is thin, brittle, and curved, which is the worst combination there is for drilling. The answer is to abrade rather than cut, support the shell from underneath, and go slower than feels sensible. There are two ways to do it — one needs no power tool at all, and for most shells it is the one I would try first.
- Modeling clay, damp sand, or a folded towel to bed the shell into
- Sharp-pointed scissors or an awl for the hand method
- Rotary tool with a diamond ball or spear bit, 1 to 2 mm
- A dish of water, and something to drip it with
- Safety glasses, and a mask if you cannot work wet
What’s Inside!
Method 1: No Drill At All
Most craft shells are thin enough that you can wear a hole through them by hand, and hand pressure is far easier to control than a spinning bit. It takes a couple of minutes, and it almost never breaks the shell.
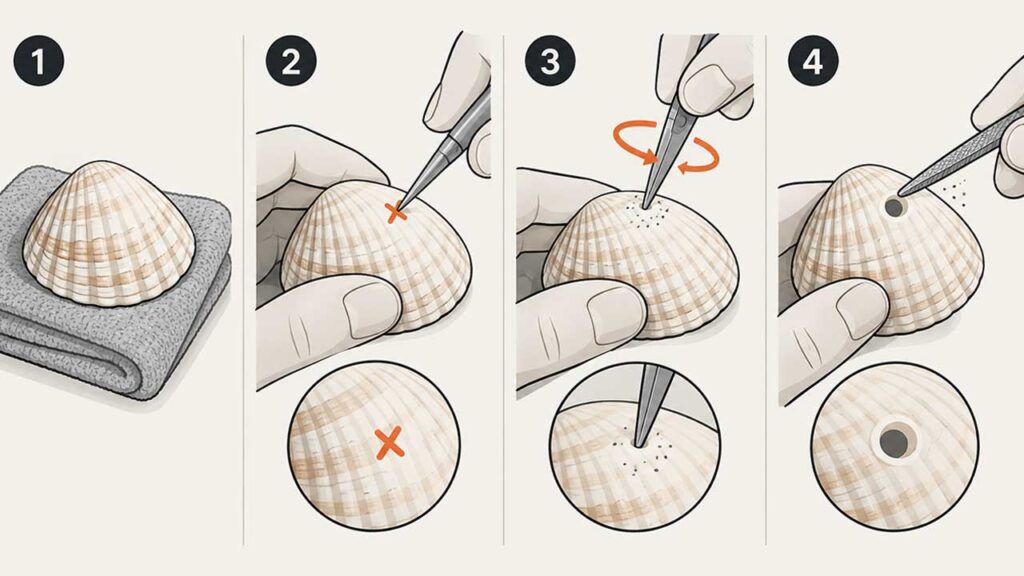
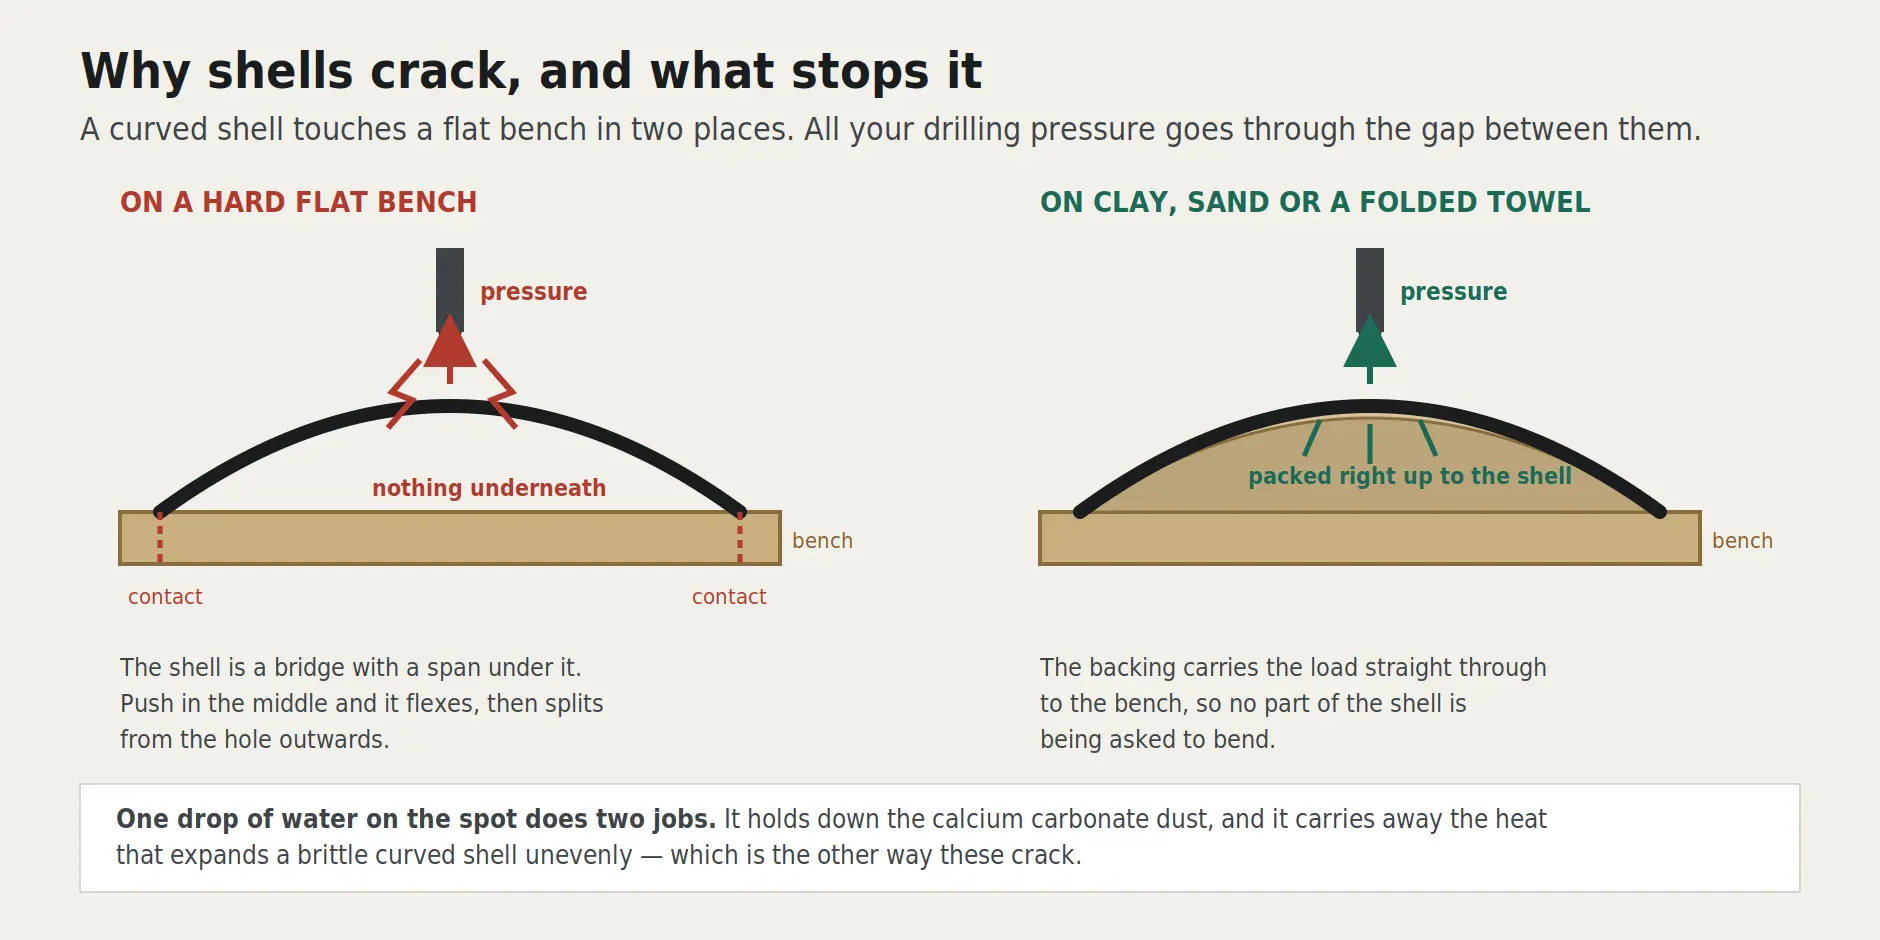
- Support the shell on something that givesA folded towel, a lump of modeling clay, or a bed of sand. The shell must be backed everywhere near the hole, not bridging a gap.
- Mark the spot away from the edge and away from any ridgeThe thinnest, flattest area is what you want. Ridges are thicker but they are also where stress runs.
- Twist, do not pushTake the point of a pair of scissors and rotate it against the spot with light pressure, like a hand drill. In my experience scissors work better than a thumbtack – the blade edge scrapes material away, whereas a tack tip concentrates force in one point and tends to punch through.
- Keep the pressure light and constantYou are grinding a dimple, then a pit, then a hole. If you feel it start to give, ease off rather than pushing through.
- Clean up the edgeA round needle file, or the same scissor point turned gently, takes the roughness off both faces.
Method 2: Rotary Tool and a Diamond Bit
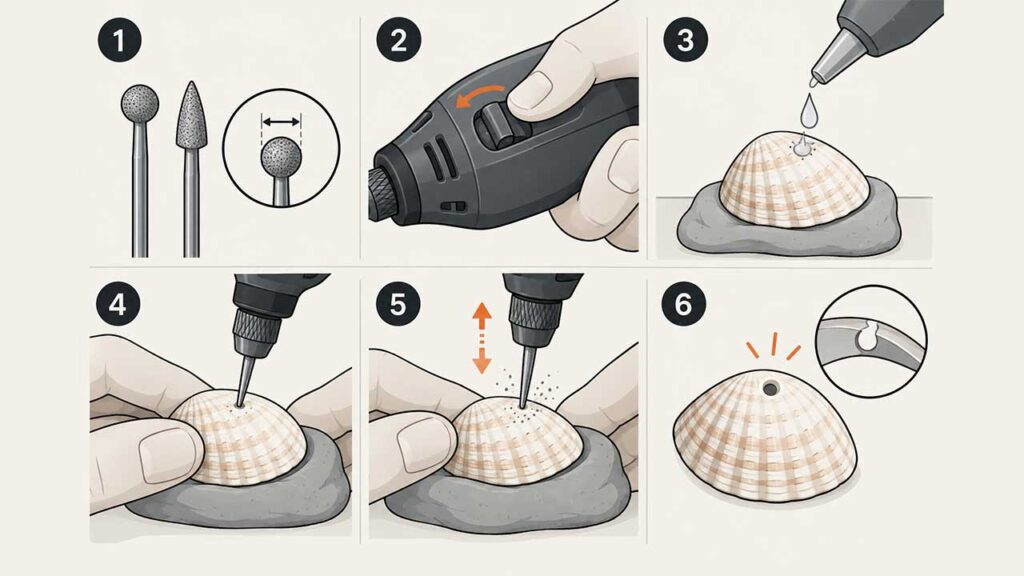
For thick shells, hard shells, or a lot of them, a rotary tool with a small diamond bit is faster and gives a neater hole. A full-size drill is the wrong tool here — too heavy, too fast at the low end, and too much torque for something you are holding in your fingers.
The tool for this job
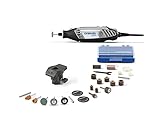
Last update on 2026-10-23 / Affiliate links / Images from Amazon Product Advertising API
- Fit a small diamond ball or spear bit1 to 2 mm for jewelry holes. Diamond abrades; a twist bit tries to cut and grabs.
- Set the lowest speed the tool hasThen check it again. Speed generates heat, heat expands the shell unevenly, and uneven expansion in a brittle curved shell is a crack.
- Wet the spotA drop of water on the shell, refreshed as it dries. It cools the cut and stops the shell dust becoming airborne.
- Support underneath and hold the shell down, not upClay or sand behind the drilling point. Fingers go beside the hole, never under it.
- Touch and lift, repeatedlyShort contacts of a second or two rather than continuous pressure. Let it grind its way in.
- Ease off at breakthroughAs with glass and tile, the far side has nothing behind it. This is where a neat hole becomes a chipped crater.
Shell Dust Is Not Harmless
Dry-grinding shell produces a fine calcium carbonate dust, and some shells carry more than that
- Work wet. A drop of water on the drilling spot suppresses almost all of the dust and cools the cut at the same time. It is the single measure that handles both problems.
- Wear a mask if you must work dry, and ventilate. Fine mineral dust is an irritant at best and there is no reason to breathe it.
- Safety glasses. Shell fragments are sharp and a rotary tool throws them at speed.
- Wash beachcombed shells first and let them dry fully. Organic residue inside a shell is unpleasant when heated, and a damp shell behaves differently under a bit than a dry one.
- Keep fingers beside the hole, never behind it. If the shell gives way, the bit continues into whatever is on the other side.
Which Method for Which Shell
| Shell | Method | Why |
|---|---|---|
| Thin, flat, translucent at the edges | Scissors, by hand | Hand pressure is controllable and there is no heat at all |
| Thick, ridged, or heavy | Rotary tool, diamond bit | Hand-twisting will take a long time and tempt you into forcing it |
| Very fragile, or one you cannot replace | Scissors, on clay, slowly | Nothing spinning near it, and you can stop the instant it feels wrong |
| Twenty of them for a project | Rotary tool | Consistency and speed. Do a spare first to find the pressure |
Common Questions
How do I know if a shell is too fragile to drill?
Hold it up to a light. If it is translucent across the area you want to drill, it is thin – use the hand method on a clay bed and expect it to take a minute. If it flexes at all under light finger pressure, or if there are existing hairline cracks running from the edge, it will break, and no technique changes that.
Can I use a regular drill?
You can, but a rotary tool is better in every way that matters here: lighter, finer control, and a much lower bottom speed. A full-size drill’s lowest speed is often still too fast for a shell, and its torque will snatch the shell out of your fingers the moment the bit catches.
What size bit for jewelry?
1 to 2 mm covers most jump rings and cords. Drill smaller than you think you need and open it up if necessary – a hole that is slightly tight can be enlarged, and one that is too big cannot be made smaller.
How do I stop the shell cracking?
Three things, in order of how often they are the cause: support it underneath so it is not bridging a gap, go slow enough that it never gets warm, and ease off at breakthrough. Pressure is almost never the answer to a hole that is not progressing.
Should I drill wet or dry?
Wet. A single drop of water on the spot cools the cut, suppresses the dust and makes the grinding action work better. Refresh it as it dries or gets thrown off.
Practice on the shell you care least about. The feel of the material giving way is the only part of this that cannot be written down.