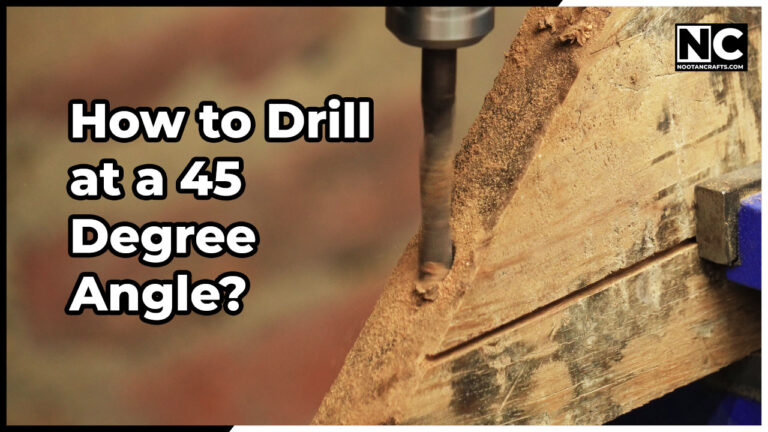
A drill bit will not start on a slope. Put it against wood at 45 degrees and it slides downhill before it bites, every time — which is why freehand angled holes end up somewhere other than where they were marked. Every method below is really a way of solving that first quarter-second.
Four ways, from no equipment to a drill press, and the honest verdict is that the second one is what most people should buy.
| Method | Accuracy | Use it when |
|---|---|---|
| Freehand with a starter dimple | Rough – a few degrees out | One hole, hidden, and nothing depends on the angle |
| Drill guide jig | Good and repeatable | Pocket holes, dowels, anything you will do more than once |
| Shop-made 45-degree block | As good as your cut | You have scrap and a saw, and want it today |
| Drill press with a tilted table or wedge | Best | The workpiece fits on the table and the angle must be exact |
What’s Inside!
Freehand, and How to Make It Less Bad
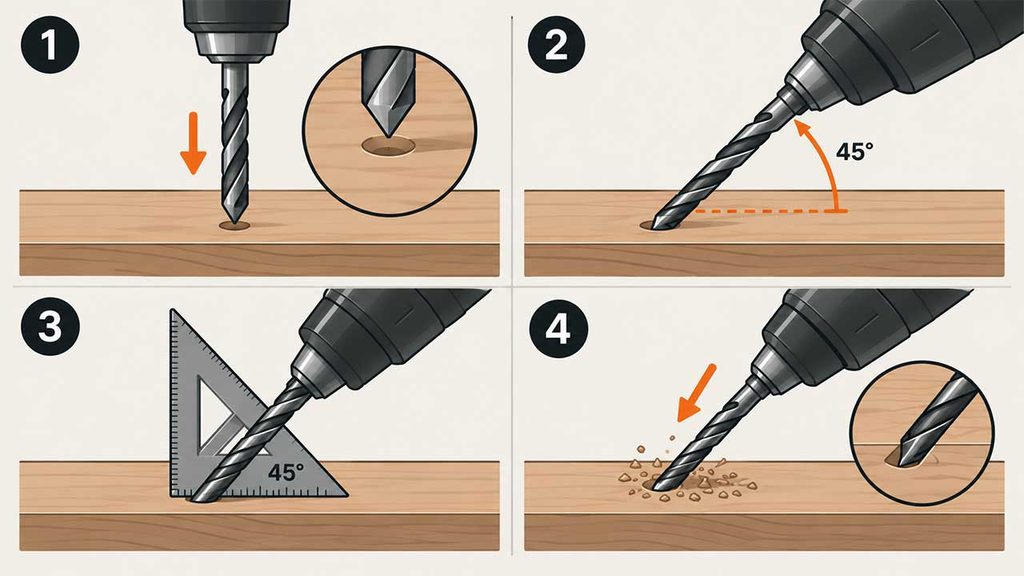
- Punch or dimple the spot firstStart the hole vertically, just deep enough to make a dimple the bit can sit in – a couple of millimeters. That dimple is what stops it sliding when you tilt over.
- Tilt to the angle and let the dimple hold itBring the drill over to 45 degrees with the bit already seated. It will want to climb out; light steady pressure keeps it in.
- Sight against something squareA speed square or a scrap cut at 45 stood next to the bit gives your eye a reference. Judging 45 degrees unaided is much harder than it sounds, and people consistently drill shallower than they think.
- Go slow until the flutes are buriedOnce the full diameter of the bit is in the wood, the hole is committed and holds its own line. Everything before that is the risky part.
A brad point bit makes this dramatically easier. The center spur bites before the cutting edges do, so it holds position on a slope where a twist bit skates. If you drill angled holes in wood more than occasionally, the bit matters more than the technique.
A Drill Guide Jig
The practical answer for anyone doing this more than once. A guide jig clamps to the work and holds a hardened bushing at a fixed angle, so the bit cannot wander and cannot change angle partway down. Pocket-hole jigs are the same idea at a fixed 15 degrees or so; general-purpose guides give you 45 and everything between.
The tool for this job

Last update on 2026-09-23 / Affiliate links / Images from Amazon Product Advertising API
- Clamp the jig where the hole startsNot where you want it to end. The bushing position is the entry point.
- If the jig has two bushings, use the larger one firstOn a pocket-hole style jig that cuts the counterbore. Then move to the smaller bushing for the pilot hole that the screw follows.
- Set a depth stopA collar on the bit, or tape wrapped round it. An angled hole is longer than the material’s thickness, so the depth that would be safe drilling square will break through on a slope.
- Drill in one continuous passClear chips by pulling the bit out and back in rather than stopping and restarting, which lets the bit find a new line.
A Block You Can Make in Ten Minutes
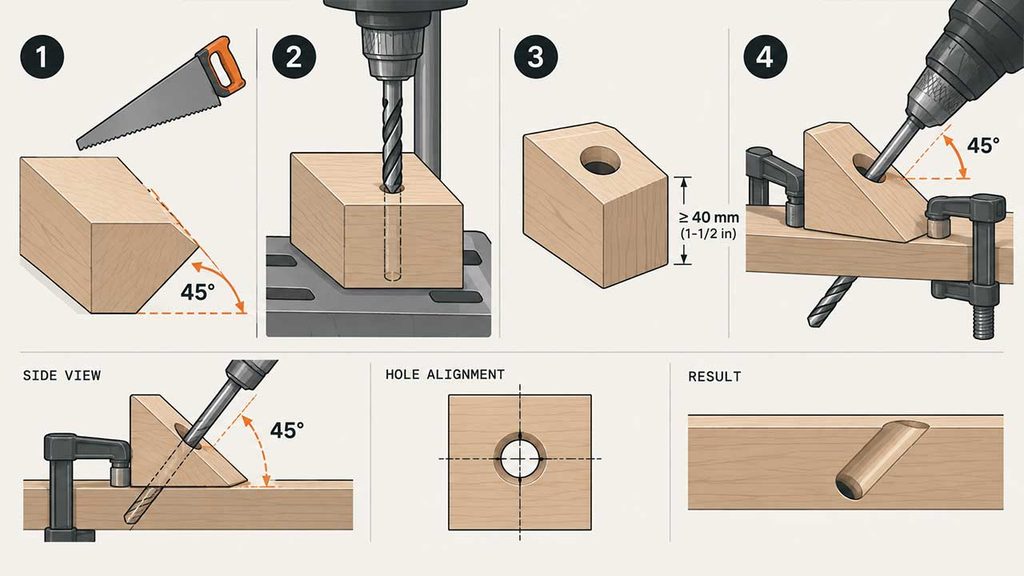
Cut a scrap of hardwood or plywood at 45 degrees, then drill a hole straight through it perpendicular to the cut face, using a drill press or the squarest setup you have. Now you have a guide block: clamp it to the work with the angled face down, and the bit passes through it at exactly 45 degrees.
The block is only as accurate as the hole you drill through it, which is the catch—you need one accurate hole to make a jig that gives you unlimited accurate holes. Make it thick, at least 40 mm (1-1/2 in), because a longer bushing hole controls the bit’s angle better than a short one.
Drill Press
If the work fits on the table, this is the accurate answer – and if you have no press, four ways to drill straight without one. Two ways around it: tilt the table to 45 degrees and keep the work flat on it, or leave the table level and sit the work on a 45-degree wedge. The wedge is usually better — a tilted table wants to slide the workpiece downhill, and clamping to a sloped surface is awkward.
Clamp the work to the table, not just to the fence. An angled setup turns some of the bit’s downward force into sideways force, and a piece that would sit still on a flat table will walk on a slope. This is where a workpiece is most likely to grab and spin, and on a press it spins fast.
Common Questions
Why does my bit slide when I start at an angle?
Because nothing is holding it. On a slope the bit’s own downward force has a sideways component, and until the flutes are buried there is nothing resisting it. Dimple the spot vertically first, or use a guide, or use a brad point bit whose center spur bites before the cutting edges.
How do I check the angle is actually 45?
Stand a speed square or a combination square beside the bit and sight along it. Unaided estimates are usually shallower than 45 – people under-tilt. If the angle has to be right rather than roughly right, use a jig or a press; eyeballing gets you within a few degrees at best.
Do these methods work on metal?
The jig and the press do. Freehand does not – metal gives no help at all to a bit trying to start on a slope, and a bit skating across steel work-hardens the surface it skates over, which makes the next attempt harder. Center punch, guide, slow speed, cutting oil.
What if my angle only needs to be close?
Freehand with a starter dimple is fine, and that covers a lot of real work – a drainage hole, a hidden fixing, a cable run. Reserve the jig for joinery, where two angled holes that disagree by three degrees will not let the parts meet.
How deep will the hole be?
Longer than the material is thick. At 45 degrees the path through a board is about 1.4 times its thickness, so a depth setting that stops safely short on a square hole will break through on an angled one. Set the stop from the angled length, not the board thickness.
If you take one thing from this: the difficulty is entirely in the first quarter-second. Solve the start, and the hole takes care of itself.