I know, you might have questions, like: How to install an NVMe SSD with a heatsink? Which type of heatsink should I choose for my SSD?
Some of you might also think:
- Does an SSD even require a heatsink?
- Why do SSDs get hot in the first place?
- What will happen if I don’t use a heatsink on an SSD?
These are legit questions, but consider this: your SSD might be blazing fast, but without a proper heatsink, it’s like running a sports bike without a cooling radiator; it will run hot and crawl when you need it most. And nope—just sticking metal on top with sloppy rubber bands doesn’t count, especially for Gen 4 or later SSDs, they run nuclear hot. A surprising number of people do it wrong, then wonder why their performance tanks.
Recommended Products!


Last update on 2026-03-31 / Affiliate links / Images from Amazon Product Advertising API
I’ve done it. You probably have too, or you’re about to. That’s why this guide exists—to walk you through how to properly install an SSD heatsink, avoid dumb mistakes, and keep your beast under control so it can perform peacefully. It’s simpler than you think, but the details matter. So, let’s do this!
Why SSD Heatsinks Matter
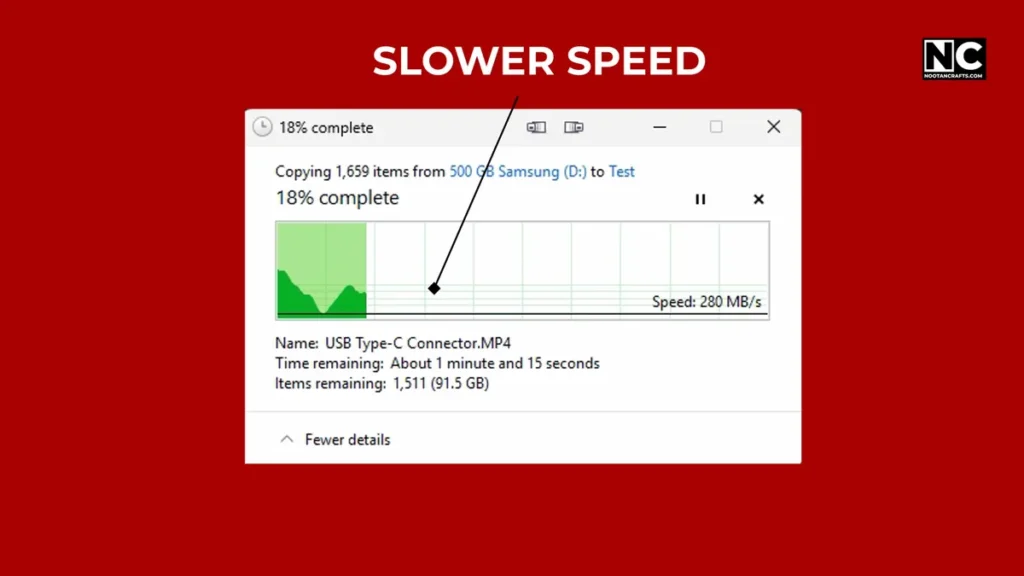
When I built my PC, I thought the heatsinks were used for CPUs and GPUs. But one day, I noticed slower file transfers, and I thought, Am I using a PCIe SSD or a SATA drive? Turns out? It was thermal throttling—my drive was too hot, as I checked with my hand as well. It entered a state of “survival mode,” slowing itself to avoid damage.
NVMe SSDs (especially Gen4 or later) tend to get hot under load, often exceeding 70°C or more. Without cooling, that heat builds up fast during gaming, video editing, bulk data transfer, or even large software installs. That’s where a heatsink for SSDs not just makes sense, but it’s inevitable.
Add one, and you could drop temps by 10–20°C. That means no throttling, longer SSD life, and possibly a hug from your SSD!
But Why Do SSDs Get Hot?
Great question, SSDs don’t have moving parts like old-school hard drives, but why do they get even hotter?
In every NVMe SSD, there is a controller chip, which serves as the brain of the entire system. Every time you do a file transfer, play games, or run a virtual machine, this controller is under heavy load, crunching data at crazy speeds. And just like any fast processor, it generates heat.
Additionally, the storage “chamber” of the NAND flash memory contributes to the overall temperature of the module, especially in Gen 4 or later drives.
Now, throw that SSD into a cramped case alongside a massive GPU that is already under stress during load, and what do you get? A preheated oven is ready to bake your bread.
Most motherboards place their SSDs in an awkward spot, such as between components or under a GPU, which restricts airflow. So, yeah, it’s just a storage device, but your SSD works hard and needs cooling too, to function correctly.
What You’ll Need Before Starting
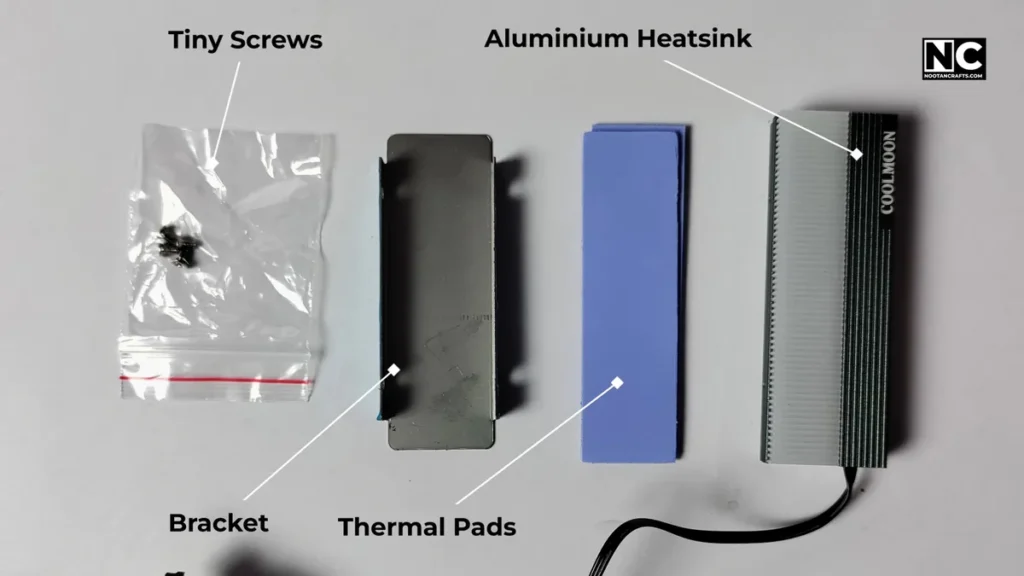
Here’s your basic toolkit before you begin:
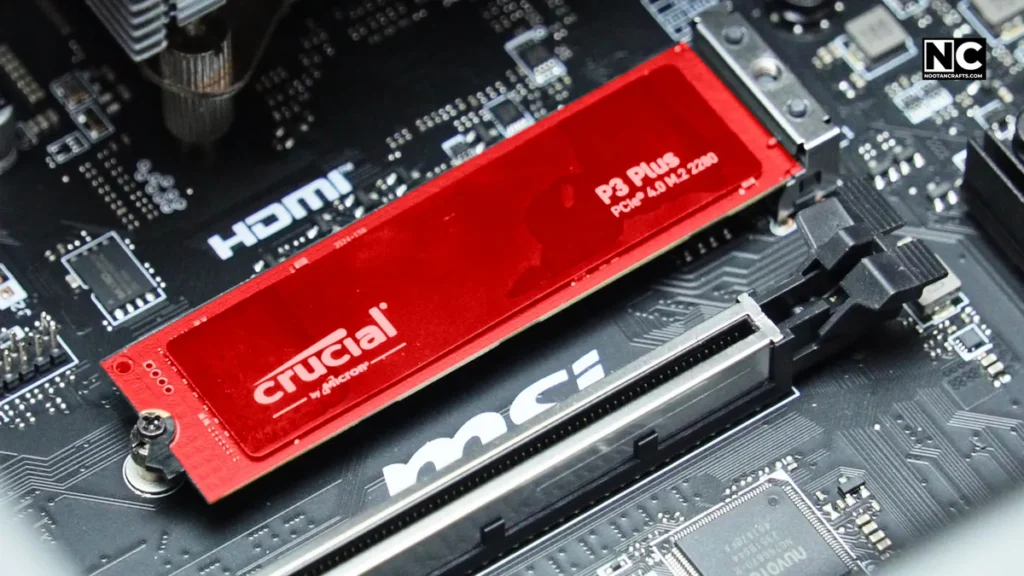
- Your NVMe SSD (of course)
- A compatible M.2 heatsink (don’t skimp here)
- Thermal pads (usually included with the heatsink)
- A small Phillips-head screwdriver
- (Optional) Isopropyl alcohol + cloth for cleaning surfaces
How to Install an NVMe SSD with Heatsink – Step-by-Step Guide
I’ll walk you through how I installed it in my recent PC build. It didn’t take me more than 10 minutes, but only after I had made all the mistakes in my life earlier.
How to Install an NVMe SSD With a Heatsink – Step-by-Step Guide
1. Shut Down and Unplug Your PC
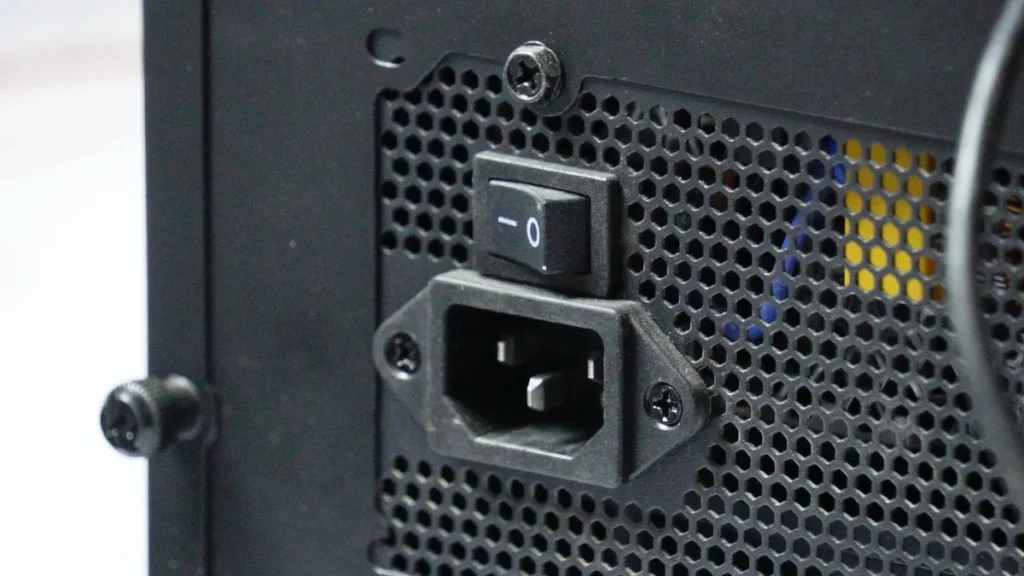
Don’t skip this. It’s not just recommended to install an SSD, but also during every hardware maintenance on your PC. Unplug the power cable and press the power button once to discharge any residual flea power.
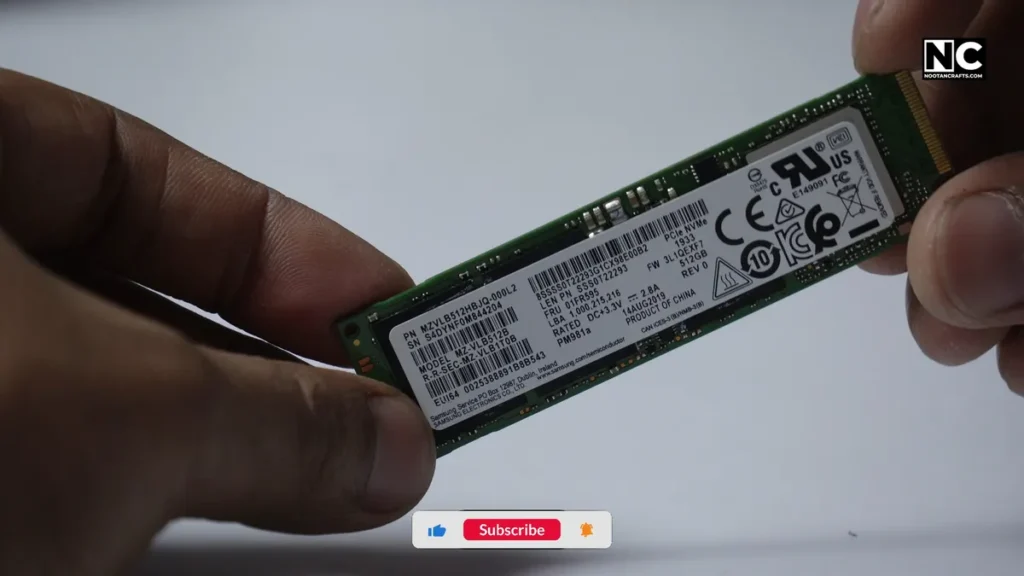
2. Remove the SSD (If Already Installed)
Locate your M.2 slot, unscrew the tiny SSD screw, and gently slide the drive out. Grab it by the edges—not the chips.
3. Peel Off Any Factory Stickers (Optional)
Some SSDs come with thin sticker labels, but they are fine. If it’s just branding, it’s safe to remove. If it’s a warranty sticker, double-check with the manufacturer for verification. Altogether, you want direct contact between the thermal pad and the chip side for efficient heat dissipation.
4. Remove the Film from the Thermal Pad
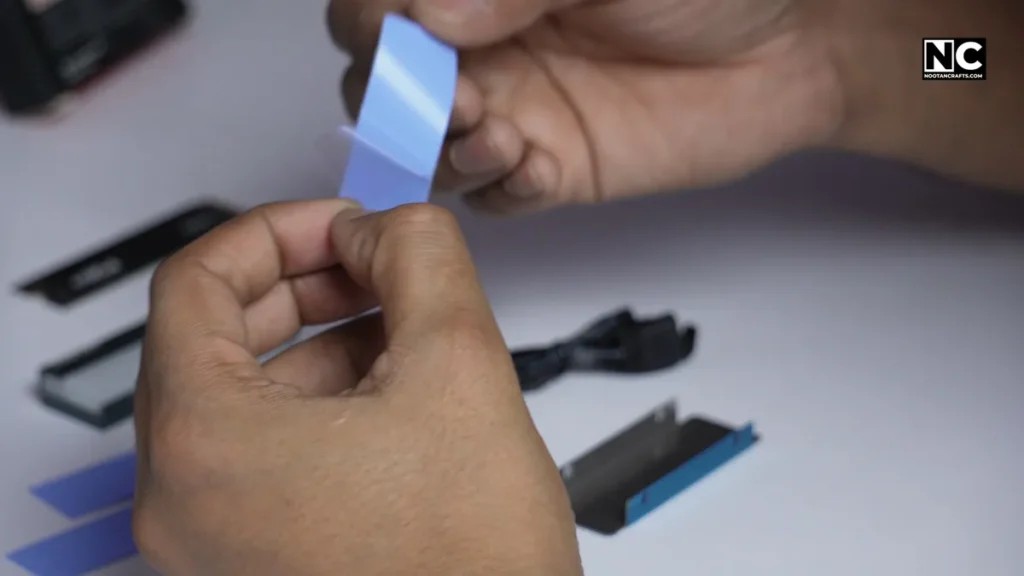

This is where most people go wrong. The thermal pad has a transparent plastic film on one or both sides.
If you don’t remove it, it insulates the heat instead of removing it.
Before blaming the heatsink brand, ensure that the thin “camouflage” covering is removed.
5. Place the Thermal Pad on the Chip Side

As you know, the heat comes from the controller and NAND chips, not the label or the back. Place the thermal pad neatly over the front side, covering both chips.
If your heatsink kit has a second pad for the back, use it only if the bracket or design supports complete contact on both sides, such as when sandwiching an SSD.
6. Mount the Heatsink Gently
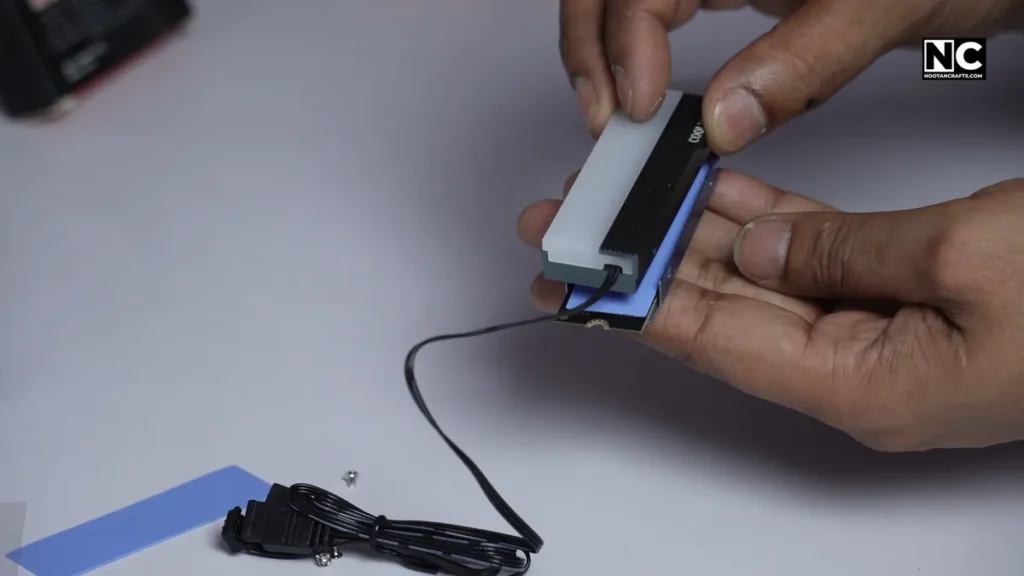
Some heatsinks use clips, some have screws, and others use rubber bands (yes, really). Align it carefully over the pad to ensure firm contact, but avoid overcompensating.
Don’t squash the SSD like you’re closing a suitcase. Be gentle, but make sure it’s snug.
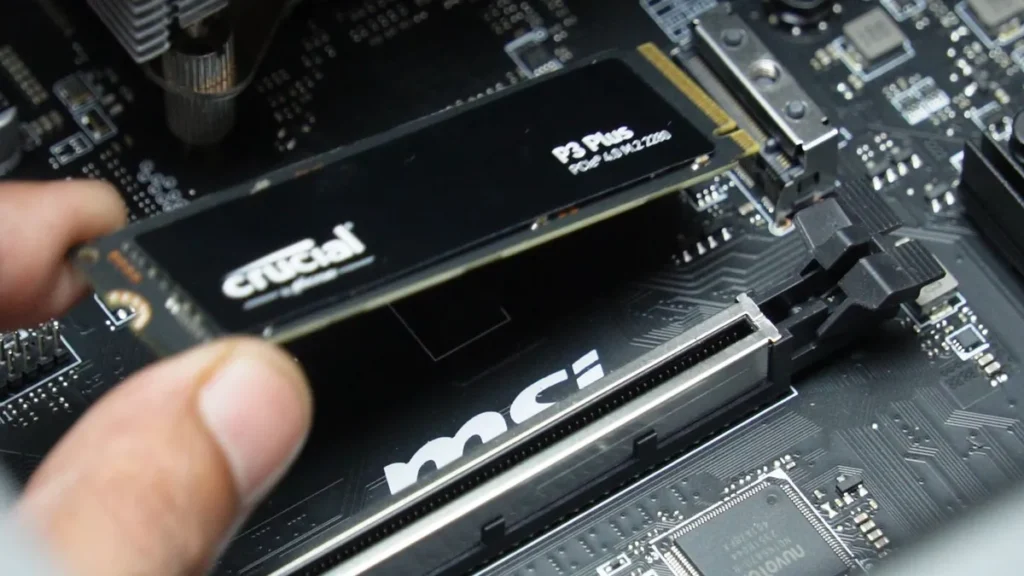
7. Reinsert SSD into M.2 Slot
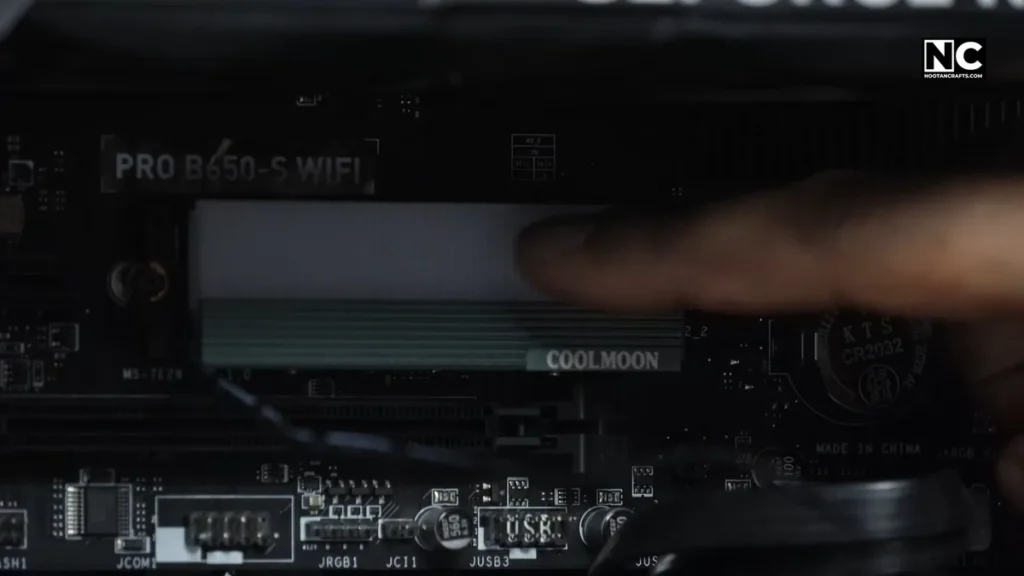
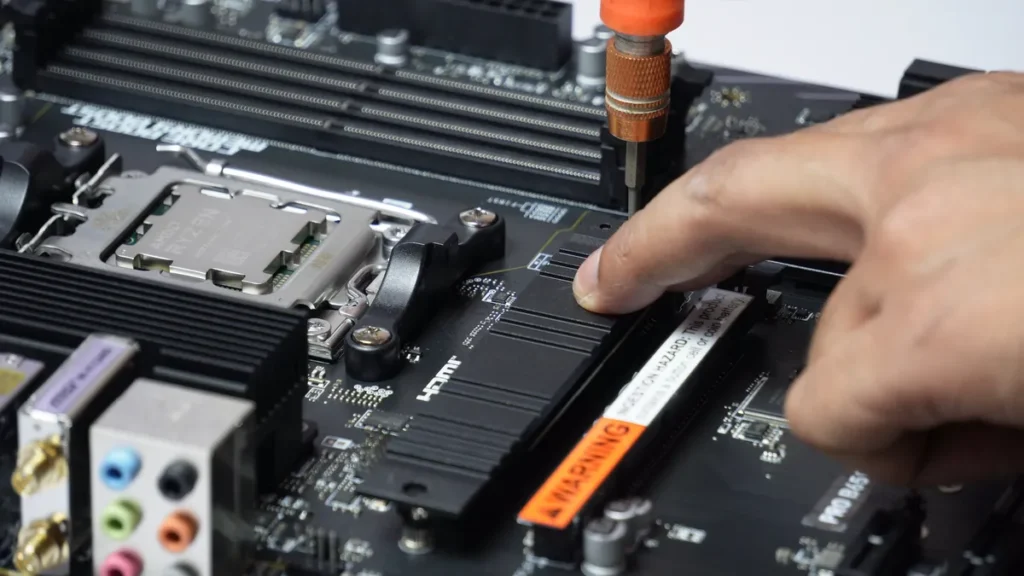
Slide the SSD back into its slot at a slight angle, let it click into place, then gently push it down and secure it with the original mounting method, such as a screw or latch.
Make sure your heatsink doesn’t block any components or airflow.
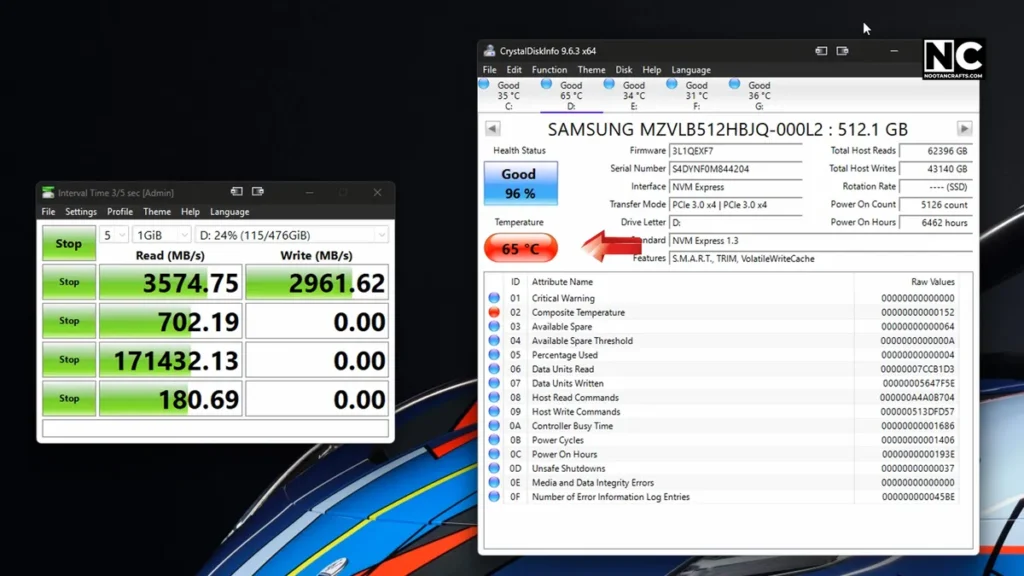
8. Power On and Monitor Temps
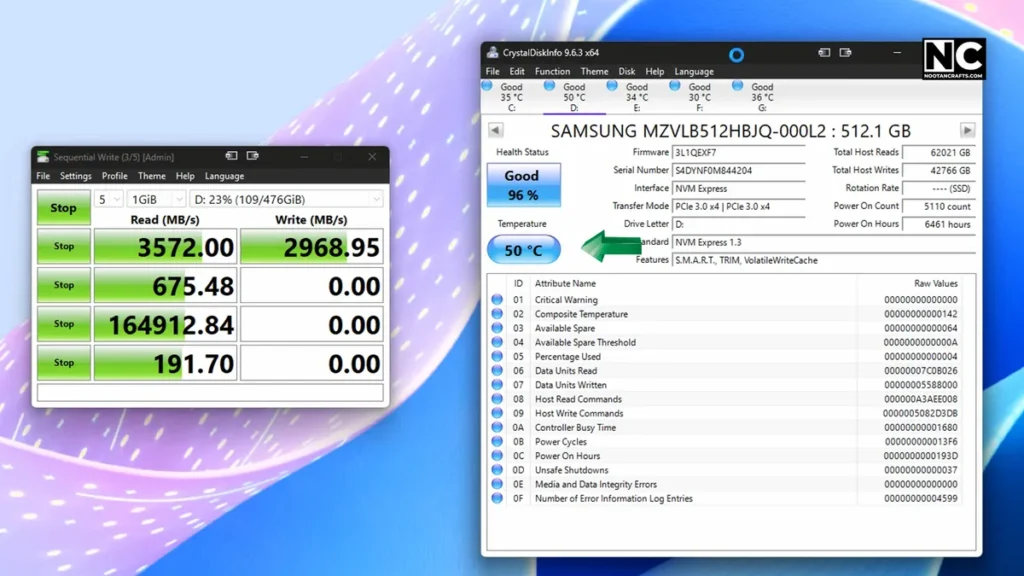
Once it’s installed, boot up your PC and check your SSD temps using:
- CrystalDiskInfo
- HWInfo64
- BIOS hardware monitor
You should see idle temps drop by 5–10°C and load temps drop by up to 15-20°C, depending on your drive and setup.
Common Mistakes to Avoid
Here are a few mistakes I’ve personally made (so you don’t have to):
- Didn’t remove thermal pad film (yes, it’s more common than you think)
- Put the pad on the wrong side (the back!)
- Bought an incompatible heatsink (it didn’t fit between the GPU and the PSU)
- Overtightened the bracket and cracked the pad
- Blocked airflow by installing it upside down
Every step matters; a small mistake can make your SSD even hotter than it already is.
How to Check SSD Temperature Like a Pro
You don’t need fancy tools. Just install one of these:
- CrystalDiskInfo – Free, simple, shows drive health & temps.
- HWInfo64 – Advanced sensors and graphs, if you want detailed info.
- Open Hardware Monitor – Lightweight and great for quick checks
- BIOS – Usually shows idle temps in the “Hardware Monitor” tab
Look for anything above 70°C under load—that’s your red flag. Software like CrystalDiskInfo will show a red label that shows your SSD is cooking itself.
Do All SSDs Need Heatsinks?
Short answer: No. But many should.
- Gen5 SSDs? Inevitable.
- Gen4 SSDs? Absolutely yes.
- Gen3 SSDs used heavily? Strongly recommended.
- Entry-level SATA SSDs? Not really.
- Built-in heatsinks? Skip the extra one unless you’re replacing it.
If your PC has a compact build or an SSD is adjacent to a powerful GPU, adding a heatsink is a cost-effective measure.
How to Install an NVMe SSD With a Heatsink – FAQs
Q1: Can I install a heatsink without removing the SSD sticker?
Sometimes, yes, but for optimal heat transfer, it’s better to remove it. However, make sure it’s not a warranty label.
Q2: What side should the thermal pad go on?
The chip side of the SSD—the one with the controller and NAND flash.
Q3: Can a poor installation damage the SSD?
Yes. Bad thermal contact or overtightening can trap heat or cause mechanical pressure issues.
Q4: How much temperature drop should I expect?
Anywhere from 8 °C to 20°C, depending on the drive, case airflow, and heatsink quality.
Q5: Is this upgrade worth it?
If your SSD runs hot or throttles, then yes, 100%. It’s not just an upgrade but an essential step to keep your SSD’s health in check.
Conclusion
An SSD heatsink may appear to be just a dummy chunk of metal, but when installed properly, it can be a lifesaver for your SSD, extending its lifespan.
Just remember the golden rules:
- Peel the thermal pad film ✅
- Stick it on the chip side ✅
- Mount the heatsink gently but firmly ✅
- Check your temps ✅
- Don’t overcomplicate it ✅
Don’t let your blazing-fast SSD melt down by throwing it like an orphan child. Use a proper heatsink to ensure its well-being and, of course, enjoy its true potential.
Keep crafting. Thanks for reading!