I recently built my new Ryzen 7 PC and installed 10 fans with excitement, but I realized that more fans don’t necessarily equal better airflow and lower temperatures. It’s not just about occupying every fan opening of your PC case; it’s a science. Let’s understand how to install fans in a PC case correctly, ensuring proper airflow, orientation, and cable management.
I have divided this post into four parts for better understanding. We will cover:
- Understanding the types of fans and airflow
- How many fans are required, and where can they be installed?
- How do you mount the fans?
- How do we test and tweak the fans?
So, what are we waiting for? Let’s do this!
What’s Inside!
- 1 – How to Install Fans in a PC Case?
- 2 – 1. Types of Fans and Airflow
- 3 – 2. How Many and Where
- 4 – 3. Mounting the Fans
- 5 – 4. Testing and Tweaking
- 6 – Common Mistakes and How to Avoid Them
- 7 – General FAQs
- 7.1 – Q1: Is it better to have more intake or exhaust fans?
- 7.2 – Q2: Can I install fans without using screws?
- 7.3 – Q3: Should top-mounted fans be intake or exhaust?
- 7.4 – Q4: What happens if I mix 3-pin and 4-pin fans?
- 7.5 – Q5: How often should I clean my fans and filters?
- 7.6 – Q6: Can I use fan splitters safely?
- 7.7 – Q7: How do I know if my fans are working correctly?
- 8 – Conclusion – How to Install Fans in a PC Case?
How to Install Fans in a PC Case?
1. Types of Fans and Airflow
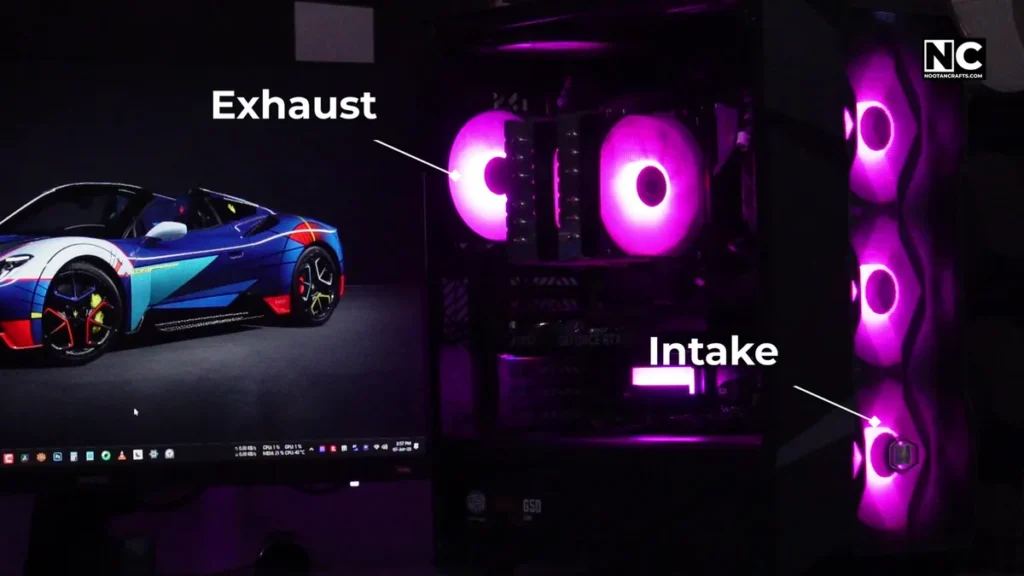
The idea is simple: to keep our system cool, we need cool air in and hot air out. That’s why we can categorize fans into intake and exhaust types.
Please don’t get confused; the fans we install for intake or exhaust are the same. If we change the direction of a fan, it can be used as an intake or exhaust fan.
How do you identify the airflow direction of a fan?
There are three ways to do that:
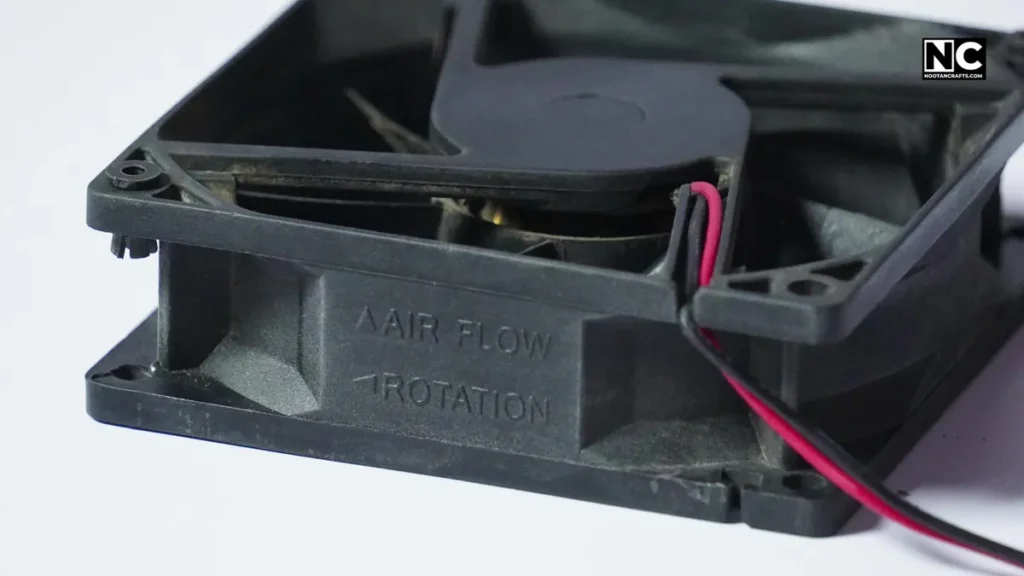
Reading the symbol – Some fans come with an arrow symbol representing the Airflow direction and rotation onto their bodies.
Clean side = Intake side – The open and clean side of the blades takes in air, and the fan’s support struts or crossbars direct air out.
Manual testing – You can manually test a fan by powering it up and holding a tissue or paper strip near each side. The side that sucks air in is the intake, and the side that blows it away is the exhaust.
Types of airflow setups
- Positive pressure: It involves more intake fans than exhaust fans. This setup keeps dust out if you have filters.
- Negative pressure: more exhaust. It can suck in dust from every opening if not filtered.
- Neutral: equal intake and exhaust. Often, the sweet spot.
Consider the size according to your case.
- Mid-sized tower coolers, older cases – 80mm
- Most common size for case fans and radiators – 120mm
- Larger airflow, quieter operation, modern mid/full towers – 140mm
- High-airflow front/top fans in large full tower cases – 200mm
Some fans may be slim or thick regardless of size, which can also affect performance.
Slim Profile Fans (e.g., 15mm deep): They are Ideal for space-constrained builds, but they offer less static pressure and airflow. They are recommended for less restrictive cooling.
Thick Profile Fans (e.g., 25mm or 38mm deep): Designed for maximum performance, they provide higher static pressure and superior airflow, excelling in demanding applications like radiators.
2. How Many and Where
How many fans do we need, and where should they be placed in our computer case?
You shouldn’t make the mistake I made by installing nine fans. Here is the basic setup that works for most builds:
Here is what I learned: the basic setup that works for most builds:
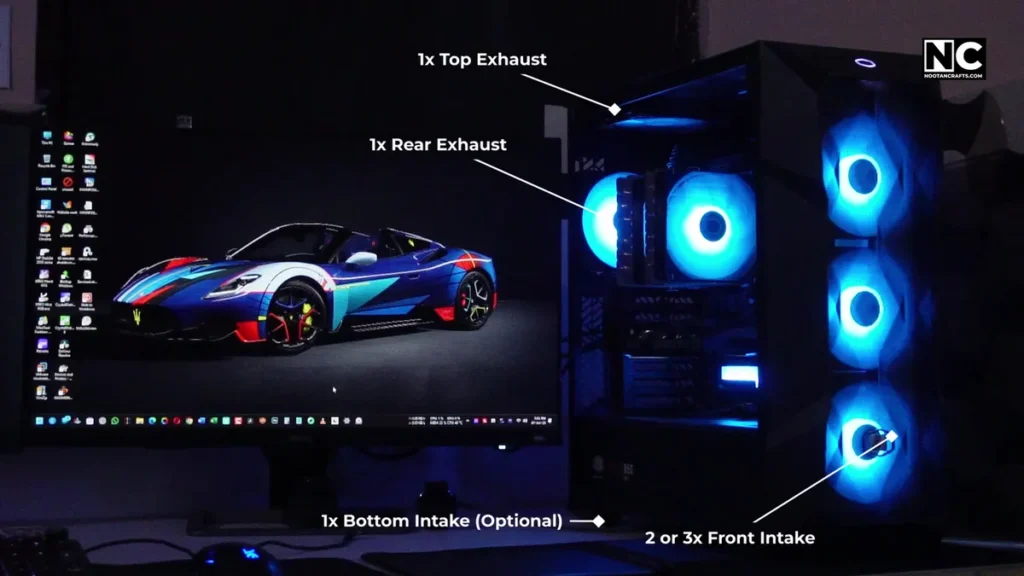
One rear exhaust, two or three front intakes, one bottom intake, or one top exhaust, and that’s it. We need to create positive pressure in our cabinet, which means having fewer exhaust fans than intake fans.
My mistake: I installed a total of 9 fans in the cabinet, the problem was caused by the top ones, which threw air out before it even touched the components. That’s why it’s strongly advised to install only one top and rear fan to ensure the positive pressure in the cabinet.
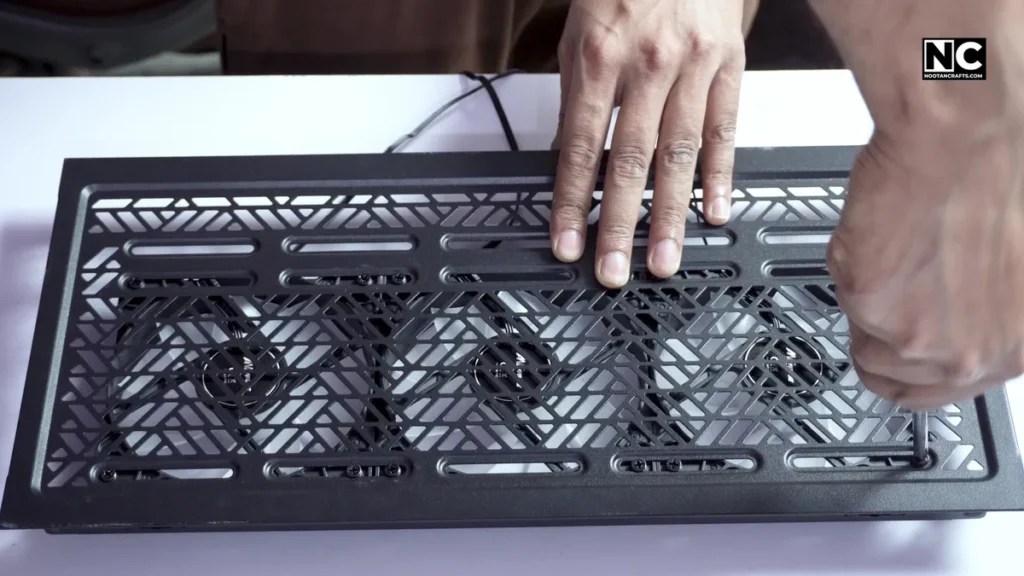
3. Mounting the Fans
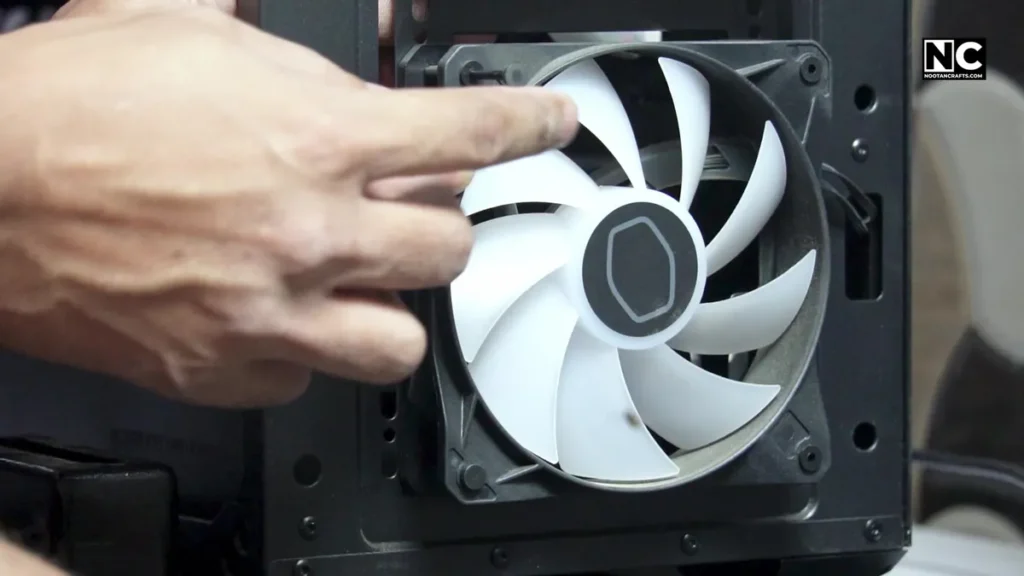
Now that you know the fan direction and where to place it, let’s start mounting them. As you know, for intake fans, we will keep the hub face outside; for exhaust fans, we will keep the hub face inside.
Use the included screws or rubber mounts to fasten the fans.
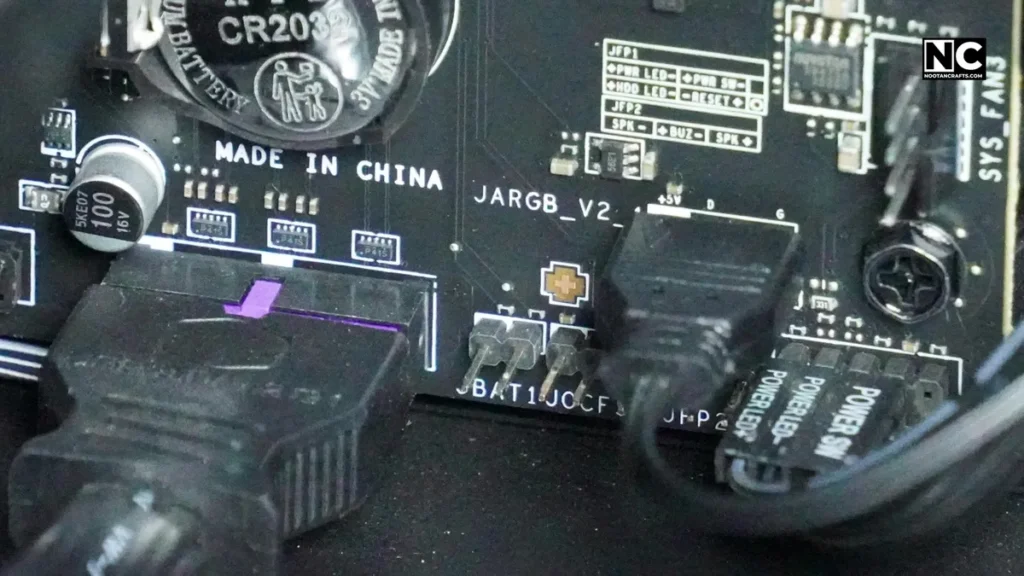
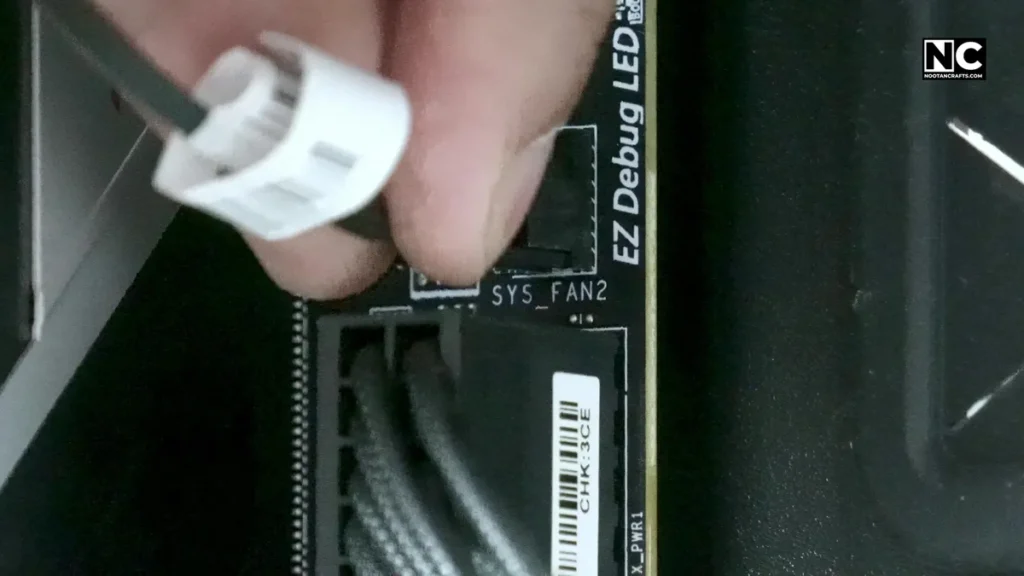

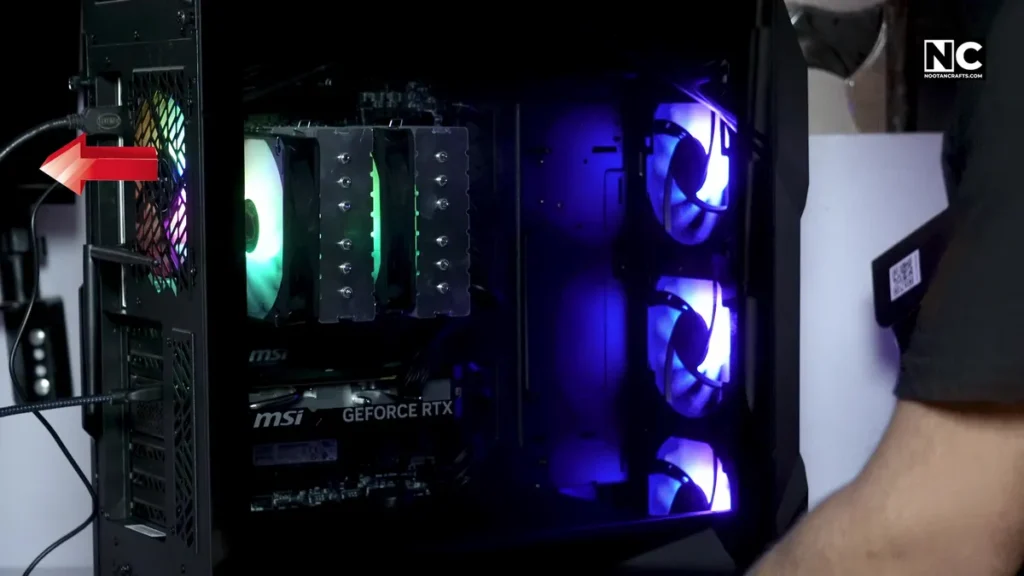
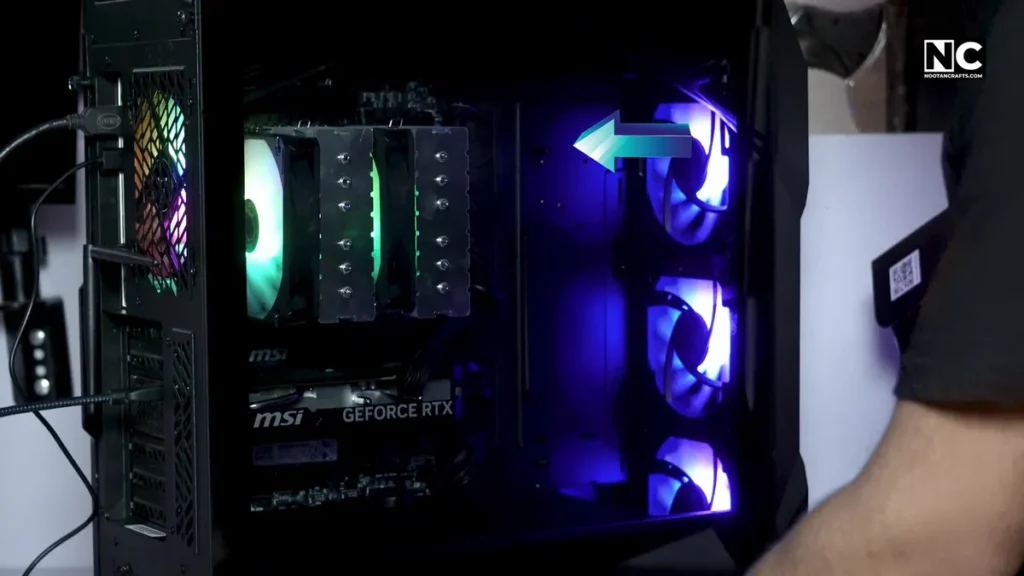
Now plug them in:
- Use SYS_FAN or CHA_FAN headers on the motherboard.
- For RGB fans, use an ARGB or RGB header on the motherboard.
- If you run out of headers? You can use a splitter or fan hub.
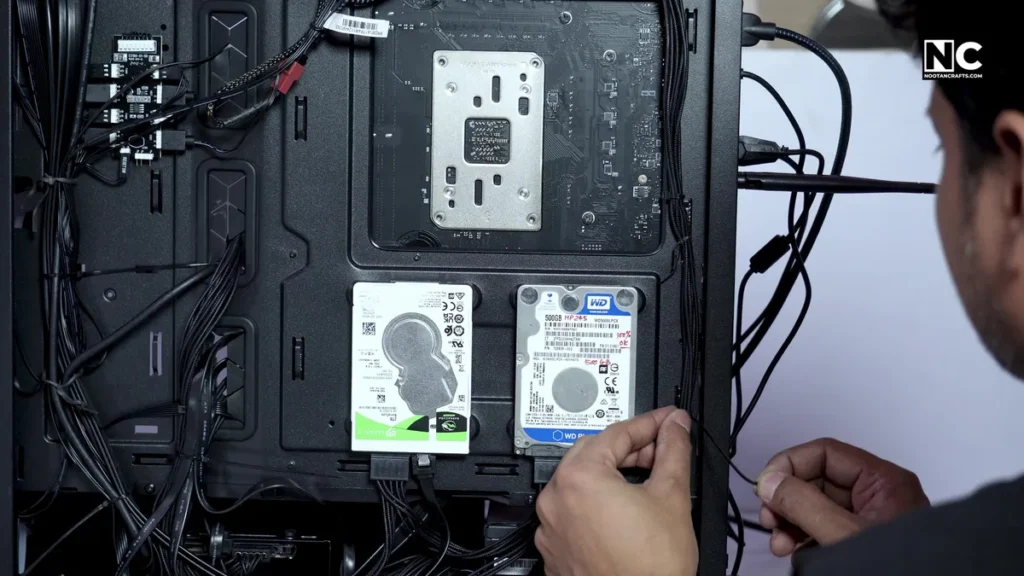
- Tuck those cables neatly behind the tray to avoid a mess.
4. Testing and Tweaking

Boot it up and check whether the fans are spinning. You can also check the airflow direction with a tissue or your hand.
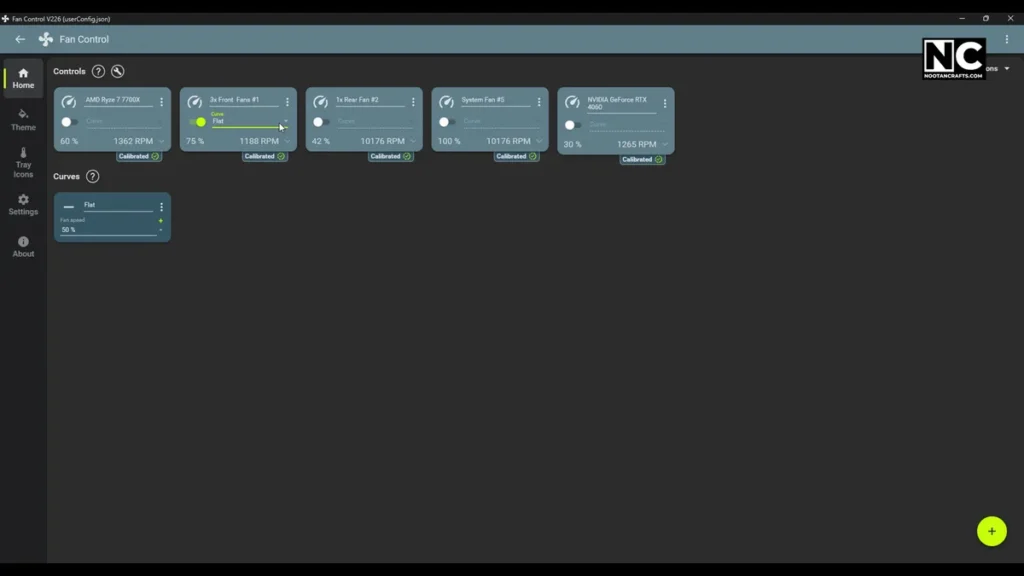
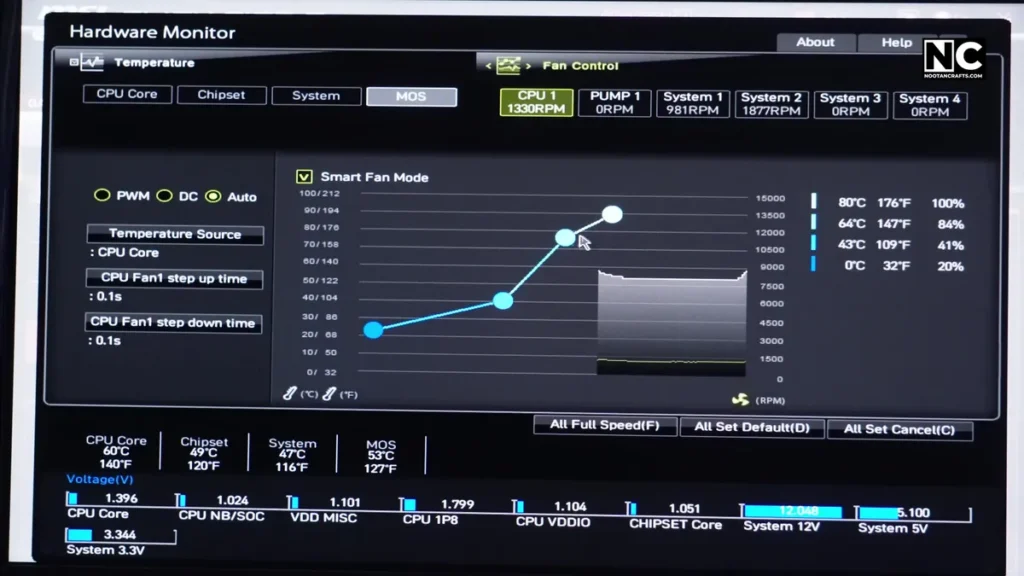
If you want more control over fan speed, you can adjust the curves in the BIOS, motherboard software, or third-party software like Fan Control. These tools allow you to set the RPM according to the temperature. You can adjust the curve to increase the fan speed, even at lower temperatures, according to your specific needs.
Common Mistakes and How to Avoid Them
Fans installed backward – Always double-check the airflow direction arrow. If you mistakenly install the rear fan to blow air into the case instead of exhausting it, you’re essentially trapping the hot air inside.
All fans are set as exhaust – This will create negative pressure, which means your case will compel to suck air and dust from every crack to balance the airflow. Air needs to flow in and out in a balanced way.
Forgetting to plug one in – It might look like fans are doing their job quietly, but they are doing so quite literally.
Overloading with too many fans – My nine fans were making a tornado, but there was no cooling benefit. I removed two fans from the top panel, and the temperature decreased.
No dust filters – Without them, your case will become a dust magnet, especially if it has negative airflow.
Take your time and keep a few things in mind. Once you’re done, open the side panel and feel the airflow with your hand; it should be a smooth breeze, not a confused storm.
General FAQs
Q1: Is it better to have more intake or exhaust fans?
Depends on your case and environment. A slightly positive pressure setup (with more intake than exhaust) is ideal.
Q2: Can I install fans without using screws?
Yes, but it’s not ideal for long-term use. Screws provide more stability over time. However, some people use zip ties and even rubber fan mounts.
Q3: Should top-mounted fans be intake or exhaust?
Always exhaust. Hot air rises naturally, so a top-mounted fan should push air out of the system.
Q4: What happens if I mix 3-pin and 4-pin fans?
3-pin fans utilize voltage control, while 4-pin fans employ PWM control, which offers more precise control. If your motherboard supports both, you’re good to go; otherwise, your 4-pin fan may behave unpredictably.
Q5: How often should I clean my fans and filters?
Ideally, I clean my fan after 4-6 weeks. However, if you live in a particularly dusty environment or have a pet, consider cleaning more frequently.
Q6: Can I use fan splitters safely?
It depends on the motherboard header; the total load should stay within its power delivery limit. Otherwise, use a dedicated fan hub to run more fans from a single header.
Q7: How do I know if my fans are working correctly?
- Check the fan speed in BIOS or software (like HWMonitor, Fan Xpert, etc.)
- Monitor system temperature.
- Listen for a strange noise, such as a clicking or grinding sound, which indicates the fan has an issue.
Conclusion – How to Install Fans in a PC Case?
If you’ve made it this far, you’re officially airflow-certified. Installing fans in a PC Case is a mix of logic, common sense, and observation.
If you do it right, your CPU and GPU will thank you every time you boot up. Keep an eye on your CPU and GPU temps, and make adjustments if needed.
If you have any killer tricks or made a fan mistake as I did, drop a comment. Also, consider subscribing to the NootanCrafts channel on YouTube. Thanks for reading.